Tuesday, March 15, 2016

Exterior Paint Problems & Solutions to Avoide it

All exterior paint problems are correctable—find the right solution here. This section lists a variety of common paint problems. To find the exterior paint tips you need to remedy the issue, simply select the problem from the list below.

A painted surface that shows fading and patterned cracking like alligator scalesAlligatoring

Alligatoring is patterned cracking in the surface of the paint film that resembles the regular scales of an alligator.

What Causes It?
This problem may be caused by applying an extremely hard, rigid coating, like an alkyd enamel, over a more flexible coating, like a latex primer.
Applying the topcoat before the undercoat is dry may also cause alligatoring.
Alternatively, the natural aging of oil-based paints as temperatures fluctuate causes constant expansion and contraction that can result in a loss of paint film elasticity.
How to Solve It
Completely remove the existing oil paint by scraping and sanding the surface. You can use a heat gun to speed up work on large surfaces, but take care to avoid igniting paint or substrate.
The surface should be primed with a high-quality latex or oil-based primer, then painted with a top-quality exterior latex paint.
Note: Images provided by The Rohm & Hass Paint Quality Institute.

Interior paint showing blistering or bubbling.Blistering

A blister can form when vapor expands between a coated surface and the film that protects it.

What Causes It?Anything from humidity to construction defects to a lack of effective vapor barriers often can lead to moisture condensation on wood siding, which generates pressure on the wood and its coating. As the surface dries, water evaporates, but the paint film does not recover.
Blisters can also form when painting in direct sunlight with solvent-based coatings on a surface that is too warm. When you apply thicker coats, or re-coat before a previous coat has completely dried, the paint surface can dry before the solvent releases from the underlying film. This traps the solvent, which can expand and cause blisters.
How to Solve ItTo remove blistered paint, sand and scrape peeling paint to the bare wood. Prime the exposed areas and repaint them.
For blisters caused by moisture, minimize any future problems by repairing loose caulking and installing vents or exhaust fans. These will allow moisture to evaporate before it can penetrate wood siding.
For large blistered areas, use a high-pressure washer or a heat gun to speed up the process of removing the paint.
Remember that blisters occur only in fresh coats of paint. When they break, they contain no liquid and do not indicate
a defect in the wood. They can be removed by scraping and sanding.
Note: Images provided by The Rohm & Hass Paint Quality Institute.


A hand stained with bluish-colored powder illustrates a paint chalking effect.Chalking

A fine powder can occur on the surface of the paint film during weathering, which can cause color fading.

What Causes It?Although some degree of chalking is a normal, desirable way for a paint film to wear, excessive film erosion can result in heavy chalking.
The use of a lower-quality, highly pigmented paint or an interior paint can cause the paint to erode prematurely and cause chalking.
How to Solve ItFirst, remove as much of the chalk residue as possible, using a stiff bristle brush (or wire brush on masonry) and then rinse thoroughly with a garden hose; or use power washing equipment. 
Check for any remaining chalk by running a hand over the surface after it dries. If noticeable chalk is still present, apply a quality oil-based or acrylic latex primer (or comparable sealer for masonry).
Repaint with a quality exterior coating. If little or no chalk remains and the old paint is sound, no priming is necessary.
Note: Images provided by The Rohm & Hass Paint Quality Institute.


The exterior of a house showing chalk run down effect from siding onto bricksChalk Run- Down

This problem occurs when the paint film erodes and the resulting residue appears chalky.

What Causes It?Chalk run-down occurs when paint erodes excessively onto another area below (a brick foundation, for example), ruining its appearance. The problem has a number of causes.
First, the use of a lower-quality, highly pigmented paint or an interior paint can cause the paint to erode prematurely. Factory-finished metal siding can also erode to cause this problem.
How to Solve ItFirst, remove as much of the chalk residue as possible by scrubbing any stained areas with a stiff brush and a detergent solution. Then, rinse the surface thoroughly. In cases of severe staining, an acid wash may be necessary. Either way, if the affected area dries to a different color, consider painting it with a quality latex paint. Eroding aluminum siding should be thoroughly cleaned (power washing recommended) before painting with a quality exterior latex paint.
Note: Images provided by The Rohm & Hass Paint Quality Institute.


An off-white colored surface that shows cracking and flaking paintCracking or Flaking 

Paint can crack and flake, sometimes revealing the substrate.

What Causes It?Dry paint can split through at least one coat, which will lead to complete failure of the paint. Early on, the problem appears as hairline cracks. Later, flaking of paint chips occurs.
A variety of causes exist for cracking or flaking of paint. First, if lower-quality paint has been applied to the surface, it will have inadequate adhesion and flexibility. Another cause is that the paint was spread too thin on the surface.
Poor surface preparation, especially when the paint is applied to bare wood without priming, can also cause this problem. Finally, painting under cool or windy conditions can make latex paint dry too fast, causing it to crack.
How to Solve ItIf the cracking does not go down to the substrate, you may be able to correct it by removing the loose or flaking paint with
a scraper or wire brush, sanding the area to feather the edges, priming any bare spots, and repainting it.
If the cracking goes down to the substrate, remove all of the paint by scraping and sanding or use a heat gun. Then prime and repaint with a quality exterior paint.
Note: Images provided by The Rohm & Hass Paint Quality Institute.
A greenish-colored painted surface covered with dirt and dust particlesDirt Pickup 

Dirt, dust particles, or other debris can accumulate on the paint film, which may resemble mildew.

What Causes It?Dirt can accumulate on lower-quality paints, especially lower grades of satin or semi-gloss.
Usually, dirt pickup is caused by soil splashing onto siding or results from air pollution, car exhaust, and flying dust collecting on the house body and horizontal trim.
How to Solve ItWash off all surface dirt before priming and painting. If unsure whether the problem is dirt or mildew, conduct a simple spot-test (see Mildew). Clean off dirt with a scrub brush and detergent solution, followed by a thorough rinsing with a garden hose. Heavier dirt accumulation may require the use of a power washer.
While dirt pickup can't be eliminated entirely, top-quality exterior latex paints typically offer superior dirt pickup resistance and washability. Also, higher-gloss paints are more resistant to dirt pickup than flat paints, which are more porous and can easily entrap dirt.
Note: Images provided by The Rohm & Hass Paint Quality Institute.


A blue-colored exterior surface showing signs of efflorescence through the paintEfflorescence or Mottling

Efflorescence or mottling appears as crusty, white salt deposits, leached from mortar or masonry as water passes through.

What Causes It?Efflorescence or mottling is caused by failing to adequately to prepare the surface by removing all previous efflorescence or when excess moisture escapes through the exterior masonry walls from the inside.
How to Solve itIf excess moisture is the cause, eliminate the source by repairing the roof, cleaning out gutters and downspouts, and sealing any cracks in the masonry with a high-quality, water-based all-acrylic or a siliconized acrylic caulk.
If moist air is originating inside the building, consider installing vents or exhaust fans, especially in kitchen, bathroom, and laundry areas.
Remove the efflorescence and all other loose material with a wire brush, power brush, or power washer; then thoroughly rinse the surface. Apply a quality water-based or solvent-based masonry sealer and allow it to dry completely; then apply a coat of top-quality exterior house paint, masonry paint, or elastomeric wall coating.
Note: Images provided by The Rohm & Hass Paint Quality Institute.


A blue colored surface divided in two halves showing one side faded and the other clearFading or Poor Color Retention

Paint can lighten over time. This occurs on surfaces with sunny southern exposures.

What Causes It?
Fading or poor color retention can also be a result of chalking of the coating.  One cause of fading is the use
of an interior grade of paint or lower-quality paint.
This can lead to a rapid degradation (chalking) of the paint film. Some paint colors are particularly vulnerable to UV radiation (most notably, certain bright reds, blues, and yellows).
Fading will also occur when tinting a white paint not intended for tinting, or overtinting a light or medium
paint base.
How to Solve ItWhen fading or poor color retention is a result of chalking,
it is necessary to remove as much of the chalk as possible. When you repaint the surface, be sure to use a quality exterior house paint in colors recommended for exterior use.
Note: Images provided by The Rohm & Hass Paint Quality Institute.


A pink surface shows one side normal and the other with frosting effectFrosting

Frosting appears a white, salt-like substance on the paint surface. Frosting can occur on any paint color, but it is less noticeable on white paint or light tints.

What Causes It?On masonry, frosting can be mistaken for efflorescence. Frosting forms mostly in protected areas (such as under eaves and open porch ceilings) that do not receive the cleansing action of rain, dew, and other moisture.
The use of dark-colored paints that have been formulated with calcium carbonate exterior may also cause this. Applying a dark-colored paint over a paint or primer containing calcium carbonate extender can also lead to this problem.
How to Solve It
Frosting can be a stubborn problem. It often cannot be washed off readily. The condition can also recur as a bleed-through even when a new top coat is applied.
In extreme cases, it can interfere with adhesion. The best remedy is to remove the frosting by wirebrushing masonry or sanding wood surfaces. Then rinse and apply an alkyd-based primer before adding a coat of high quality exterior paint.
Note: images provided by The Rohm & Hass Paint Quality Institute.


Interior Paint Problems: Lap MarksLap Marks 

Lap Marks are the appearance of a denser color or an increased gloss where wet and dry layers overlap during paint application.

What Causes It?Failing to maintain a "wet edge" when applying paint or using low-solid, "economy" paint can both lead to the formation of lap marks.
How to Solve It
When painting, make sure to maintain a wet edge by applying paint toward the unpainted area and then back into the just-painted surface. This technique (brushing or rolling from "wet to dry" rather than vice versa) will produce a smooth, uniform appearance.
It is also wise to work in manageably sized areas, and to plan for interruptions at a natural break, such as a window, door, or corner.
Using a top-quality acrylic latex paint makes it easier to avoid lapping problems because higher solids (pigments and binder) content makes lapped areas more noticeable.
If the substrate is very porous, you should apply a primer or sealer to prevent paint from drying too quickly and reducing wet-edge time. Alkyd paints generally have superior wet-edge properties.
Note: Images provided by The Rohm & Hass Paint Quality Institute.
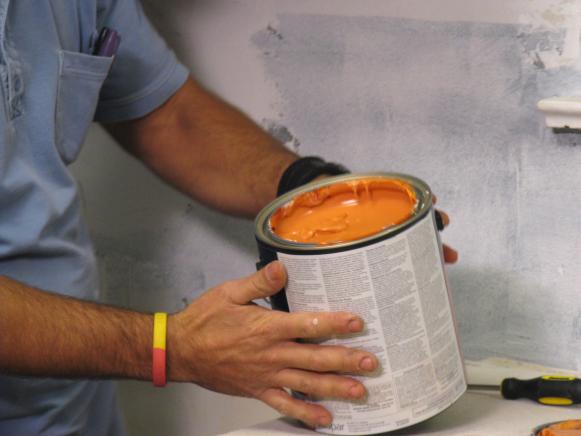

How to Paint on Your Wallpaper

You don't necessarily have to remove your old wallpaper to paint your walls a different color.
Removing wallpaper—especially if it's been on the walls for years—can cause unexpected damage to your walls. But if it's in good condition and has no signs of adhesion failure, there's no reason to invest a lot of time and effort in removing it before painting your walls.
Also, by leaving the wallpaper in place, your walls will stay in their current condition, and you'll be able to start painting without delay. Prep before Painting
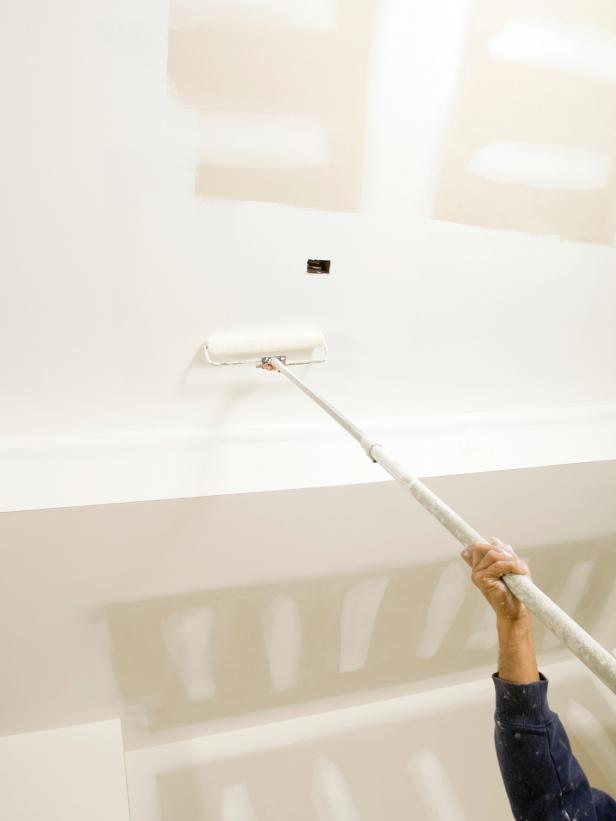
Wallpaper being painted with a paint roller.It's vital to prepare your walls carefully before painting. Follow these simple steps to ensure the best results:
  • Start by replacing any damaged sections and adding adhesive to loose pieces to minimize the chance the paper will fall.
  • Add a thin line of clear caulk around the perimeter of the walls, at the joint seam where the paper meets the floor and ceiling. This will help seal the edges and keep the paper from peeling after you've painted.
  • Cover heavily textured paper with a thin coat of joint compound (spackle). This material will help smooth out the surface so that the texture won't show through the paint.
  • Gently sand down the seams of the wallpaper so they're not too noticeable.
  • Apply a coat of oil-based primer to the entire surface of the walls before painting. This helps seal the adhesive within the paper and away from the moisture in the paint.
  • The wallpaper is now ready for painting. Because the moisture in latex paint can sometimes loosen wallpaper glue, causing bubbles or peeling, you should use oil-based paint.
Finally, it's time to enjoy your freshly painted room.

Saturday, March 12, 2016

How to use a brush and roller properly?


Learn how to give your stuff new life with a few good strokes. Note: Many manufacturers make specialty paints for specific applications; ask your paint dealer.

Brick

Set-up and Prep: Clean brick with a wire brush to remove dirt and grime; be careful not to dig out any mortar. Scrub the masonry with soapy water and rinse thoroughly. Let dry for 48 hours.
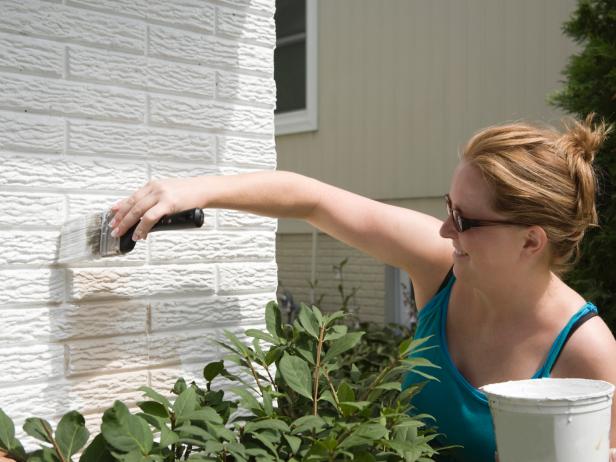
Painting: Use a first coat of quality latex primer. When the primer is dry, apply top-quality latex paint that's formulated for use on masonry. Use a long-nap roller to cover most of the surface, and a brush to get into grout lines and crevices. Watch for drips – there's a lot of texture to a brick surface, so keep an eye out for runs. A second coat is recommended.
Heads-up: Don't use a pressure-washer to clean your brick; the risk of gouging out mortar is too great. Note that painting brick is a one-way decision — it's almost impossible to remove paint from brick surfaces.

Ceramic Tile and Porcelain

Set up and Prep: Sand with 150-grit sandpaper to improve adhesion. Clean the tile surfaces with TSP or other non-residue cleaner.
Painting: Use a top-quality acrylic primer. Finish with semi-gloss acrylic interior paint. If you want, paint the grout a contrasting color — but you'll need patience and a steady hand.
Heads up: For best adhesion, allow the paint to cure for 10 days to two weeks before using the surfaces. Don't paint tile floors; there's just too much traffic and abrasion.

Concrete Slabs

Set up and Prep: Wash the slab with TSP or other non-residue cleaner. Remove any old, flaking paint. Treat oily spots with a degreaser. Let everything dry for 48 hours. Etch the surface of the concrete with a mild (10 percent) solution of muriatic acid (make sure you have plenty of ventilation).
Painting: Use a primer and paint specifically formulated for concrete floors. Apply the paint according to the manufacturer's instructions.
Heads up: Make sure your concrete isn't wicking moisture up from underneath. Tape a 2x2-foot piece of plastic to the floor (tape all edges) and wait a couple of days. Check underneath the plastic to make sure no moisture has formed on the underside of the plastic. If it has, your slab isn't a good candidate for paint.

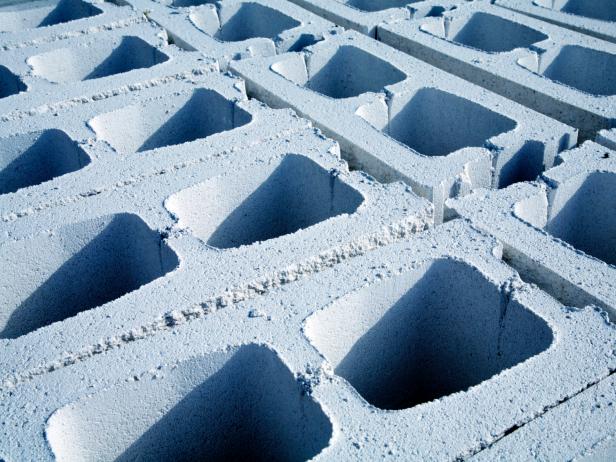
Concrete Block

Set up and Prep: Remove any loose particles and mortar, using a wire brush. Remove efflorescence with a bleach solution made from 1 cup bleach in 1 gallon of water. Clean the entire surface with TSP or other non-residue cleaner. Let everything dry 48 hours before painting.
Painting: Prepare raw block with a masonry sealer. Let dry thoroughly, then apply a high-quality acrylic latex primer. Finish with acrylic latex paint.
Heads up: For new concrete and block installations: Wait 90 days before applying paint.
Ken Welsh

Drywall

Set up and Prep: Make sure the drywall is free of dust (there's usually a lot of it from sanding). Wipe the surfaces lightly with a damp rag. For painted drywall, repair any cracks and holes with spackling compound.
Painting: Use a top-quality acrylic latex primer. For previously painted drywall, use a stain-blocking primer to cover any marks or blotches. Finish with a good-quality acrylic latex paint.
Heads up: The higher the paint sheen, the easier it is to wash and clean the surface. Semi-gloss is good for kids' rooms and kitchens.

Fabric

Set up and Prep: Wash fabrics without detergent and let dry. If possible, stretch out the fabric and lay it flat.
Painting: Use a water-based paint specifically formulated for use with fabrics. Check your local crafts store.
Heads up: You may have to fix the paint by putting the material in a dryer. Read the paint manufacturer's instructions carefully.
supergabur

Fiber-Cement Siding

Set up and Prep: Don't pre-sand fiber-cement; the dust may cause respiratory ailments.
Painting: Use a primer specifically formulated for cement and masonry products. Apply top-quality exterior paint according to the manufacturer's instructions.Heads up: Don't apply oil-based paint directly to fiber-cement without priming — you may void the manufacturer's warranty.

Fiberglass Exterior Doors

Set up and Prep: Set the door flat on a pair of saw horses. Remove all hardware. Lightly sand with 320-grit sandpaper. Remove the dust using a rag dampened with acetone. Allow to dry thoroughly.
Painting: Prime with an acrylic latex primer. When dry, apply two coats of top-quality, exterior-grade latex paint, using a brush. Sand lightly between coats.Heads up: Don't use regular household cleaners to prep your door — they may leave a residue.

Fiberglass Tubs and Showers

Set up and Prep: Sudden blasts of hot water are hard on painted fiberglass baths and showers, and various DIY methods for refinishing have mixed results. The most effective way we've found calls for finishing with automotive paint. The paint should be applied with a high-volume, low-pressure paint (HVLP) sprayer.
Sand the surfaces lightly with 220-grit sandpaper. Wash the surfaces thoroughly with TSP or non-residue cleaner, and rinse with water. When dry, wipe all surfaces with lacquer thinner. Make sure you have plenty of ventilation.
Painting: Apply an auto primer. When dry, lightly sand with 320-grit sandpaper, and wipe away the dust with damp rags. Apply a polyurethane-based automotive paint, using an HVLP.
Heads up: Another solution is to opt for Rust-Oleum's Tub and Tile Refinishing Kit.

Glass

Set up and Prep: Clean the surface with a glass cleaner.
Painting: Glass painting is a popular hobby or craft project. Check your local hobby store for paints formulated to use with glass. Some may require an undercoating or special surface application.
Heads up: Lighter colors are better for light transmission.

Laminate Countertops and Cabinet Faces

Set up and Prep: Rough up the surfaces with 150-grit sandpaper. Remove all dust and wash with TSP or other non-residue cleaner.
Painting: Use a primer specifically formulated for non-porous surfaces. Finish with at least two coats of acrylic latex enamel, using a short-nap roller.
Heads up: Painting laminate countertops isn't a permanent solution; consider it a stopgap until you can replace the countertops.

Metal

Set up and Prep: Remove any rust and flaking with a wire brush. Sand with 220-grit sandpaper. Rinse with plain water, let dry.
Painting: Use an exterior-grade primer and paint that are formulated for metal.
Heads up: The method is the same for steel, aluminum and iron.

Plastic

Set up and Prep: Sand lightly with 320-grit sandpaper. Wash with TSP or other non-residue cleaner, and rinse thoroughly.
Painting: Use a spray paint formulated for plastic. Alternative: Use exterior-grade acrylic enamel.
Heads up: After prep, don't touch the plastic with your bare hands — you'll leave oil residue that keeps the paint from sticking.

Vinyl Flooring

Painting: Sorry, not a good candidate. The surface offers poor adhesion, and flexing from foot traffic and day-to-day abrasion soon wears away paint.

Vinyl Shutters

Set up and Prep: New shutters should be wiped with mineral spirits to remove any factory-applied mold-release agents, then washed with a mild detergent. If your shutters have been outside for more than two years, you can skip the mineral spirits wipe.
Painting: Prime the shutters, using a primer specifically made for plastic and vinyl. Finish with a top-quality latex paint.
Heads up: Vinyl products are tricky to paint. Once painted, you'll want to keep your shutters undisturbed for five days in a protected location — a garage is great — to let the paint cure thoroughly. Avoid dark paint colors that absorb heat and make the vinyl expand and warp.

Vinyl Siding

Painting: The debate rages here, but the best advice is: Don't do it. A big surface area and a tricky material add up to lots of opportunities for paint failure. A lot of work for a result that could deteriorate in a year or two.

Wicker

Set up and Prep: With all its cracks and crevices, the important prep for wicker furniture is to make sure it's clean. On a warm day, give the wicker piece a hard spritz with a garden hose and wipe it dry immediately. If previously painted, sand lightly to remove any gloss.
Painting: Prime with a top quality primer. Paint with exterior-grade acrylic latex paint; a brush helps get into the crevices.
Heads up: Make any repairs prior to painting.

Wood (Bare)

Set up and Prep: Sand with progressively fine sandpaper until the surface is smooth. Remove dust with a tack rag.
Painting: Coat entire surface with a stain-blocking primer. Finish with high-quality latex or oil-based paint. Sand between coats with 320-grit sandpaper.
Heads up: After priming, check to make sure any knots aren't showing through. If they are, spot prime.
J.M. Guyon - Copyright 2010

Wood and Paneling (Painted or Sealed)

Set up and Prep: Clean surfaces with TSP or other non-residue cleaner. Roughen the surfaces with 150-grit sandpaper; clean off the dust with a damp rag.
Painting: Coat surfaces with stain-blocking primer. Finish with topcoats of latex paint.

Saturday, March 5, 2016

Essential Power Tools

vintage man using drill press power tools illustration


Tools. They are what separate most of us from the animal kingdom. For a species that started off chipping rocks into spearheads, we’ve come a long way. Even post-Neanderthal era, building just about anything revolved around hand (not power) tools. As your manly elders are all too happy to remind you, even today, there are plenty of carpentry and construction projects that a hand tool is best suited for. But that’s not why you’re here.  There are far more tasks in the course of a man’s life in which power tools put hand tools to shame (or, at least make them look slower than Congress passing a budget). Plus, power tools create noise, make dust, and embody our manly DIY-conquer-all spirit.
Here’s a list of four power tool essentials, along with some background, why you need them, and what to look for when you’re tool shopping.

Cordless Drill

cordless drill close up of power tool head Image by cogdogblog
Background / Why You Need It
A cordless drill is the most essential of essentials when it comes to power tools. Without it, you’ll be looking like an Amish carpenter as you hand-bore holes at a rate of one per hour. Nothing wrong with Amish carpenters by any means, but I’ll beat their suspenders off any day when it comes to drilling holes. With a solid cordless drill, you’ll be able to tackle most drilling tasks from small pilot holes to large holes to run electrical through, and driving fasteners from dainty screws to beefy lag bolts (although you might consider an impact driver if you’re doing much in the way of the latter). Let’s be clear: there’s no such thing as a modern handyman without a cordless drill.
What to Look For
The cordless drill market is filled with compact 12v tools. They’re light, high-tech, and strong for their size. But if you’re getting a cordless, make it count and get something beefier. There are few things less manly than having your drill whimper to a stop half-way through a piece of wood. An 18v is probably the sweet spot for good power-to-weight ratio, and it can handle most of what you task it with. Companies like DEWALT, Bosch, and Makita (among others) make solid 18v models that get the job done. Don’t cheap-out on your drill; it’s a tool you’ll rely on regularly, and you’ll thank yourself in five or ten years for spending a bit more for quality now. Most high-quality 18v models will set you back about $100-$200.

Reciprocating Saw

reciprocating saw in use workshop cutting wood Image by Toolstop
Background / Why You Need It
Destruction and demolition have been man’s work for eons. Few practical tools embody the raw destructive force of a reciprocating saw (known more commonly by the Milwaukee Tool brand name Sawzall).
The reciprocating saw will cut through most metal and wood like butter. I’ve even cut down trees with one in a pinch. If you’re remodeling, demolishing, or doing plumbing or electrical work, a reciprocating saw will get you through 2x material, pipes, etc. in no time. Just don’t cut through a wall without knowing what’s inside it; a severed live electrical or water line is no fun.  Both electrical and water together is even worse.
What To Look For
Unlike the cordless drill, corded is recommended here. Sure there are some pretty beefy cordless versions, but if you have to have one, we think corded will serve you best. It never runs out of battery and most reputable brands and models have plenty of power. Some models have rotating handles which can be useful in certain cutting situations, but for most, it’s not a necessity. The venerable Milwaukee Sawzall and Porter Cable are our personal favorites. Expect to spend around $100 for a decent saw. Blades are also critically important. Get a good assortment so you can handle whatever manly jobs come your way.

Oscillating Multi-Tool

milwaukee oscillating multi-tool in use cutting flooring Image from Toolmonger
Background/Why You Need It
I won’t call it dainty, but this is definitely the least gritty of our power tool suggestions. You’re not going to wow the ladies strutting into the room with one of these (at least not until they see it in action). If you’re not already familiar with them, an oscillating tool features a long, slender body (which has natural man-appeal), and a head that accepts a variety of attachments for detail sanding, grinding, grout removal, wood cutting, scraping, etc. The beauty of the tool is that the accessory oscillates just enough to make quick work of many small jobs without kicking up a massive dust cloud. It’s the surgical scalpel of your power tool arsenal.
Up until a couple years ago, the only true oscillating tool on the market was the Fein Multi-Master. It’s a fantastic tool, but also has a reputation of being a spendy tool with very spendy accessories. Then Fein’s patent expired, and the renaissance of multi-tools exploded. Just about every major tool manufacturer now has at least one oscillating tool on the market. What used to be a splurge item, has now become so common and affordable, it’s really an essential. While you may at first wonder what you’ll use the tool for, you’ll soon find yourself reaching for it regularly (and marveling at how you survived without it).
What to Look For
This market is changing so fast, features and new models are popping up seemingly hourly rather than yearly. We again say go with corded unless a cord will be a massive pain for your intended uses. Battery life and battery swapping can be a major annoyance on longer projects such as sanding or grinding. OIS (Oscillating Interface System), put out by Bosch, is becoming somewhat of a standard when it comes to accessories. Bosch, Skil, and Milwaukee tools, among others, directly support OIS. Fein remains the cream of the crop, and their quick-change mechanism is still a stand-out feature (although Porter Cable recently released a quick change feature on their multi-tool). Fein and Skil are also the only two that currently come to mind for dust collection support, which can be very useful, particularly on sanding projects. Expect to spend between $100-$200 for most respected models.

Circular Saw

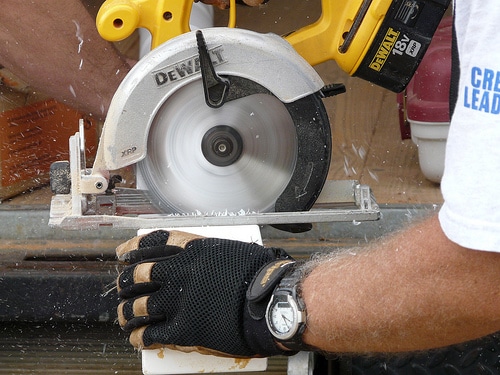
dewalt circular saw in use cutting wood protective glovesBackground/Why You Need It
When it comes to making quick work of cutting through 2x material or sheet goods, nothing compares to a circular saw. If you find yourself needing to cut a piece of wood once or twice a year, you can stick to a handsaw.  However, if your wood cutting needs are more regular, a circular saw can cut through a stack of wood in two minutes, where a handsaw might have taken ten times that. Keep in mind circ saws cut through skin and bone just as happily as they do wood, so make sure you follow manufacturer safety recommendations when brandishing this tool (and the others in this article for that matter).
What To Look For
Circular saws comes in cordless and corded varieties. If you’re cutting balsa wood for your son’s model airplane, cordless might be acceptable.  But most people cut some pretty hefty material with circular saws. If you’re going to get a circular saw, you should go straight for a corded model. Corded versions breakdown into two camps, smaller, more traditional circular saws, or more heavy-duty “worm drive” saws.  If you’re a DIY’er and have typical cutting needs, a traditional circ saw with sufficient power is all you need. Worm Drive saws tend to be popular with framers and carpenters. The worm drive saw will cut through material like butter, but they’re also heavier and tougher to manage safely with one hand.

DifferentTypes of Cement and Their Compounds

The following are the types of cement that are in practice:
Types of cement
1. Rapid Hardening Cement
2. Quick setting cement
3. Low Heat Cement
4. Sulphates resisting cement
5. Blast Furnace Slag Cement
6. High Alumina Cement
7. White Cement
8. Coloured cement
9. Pozzolanic Cement
10. Air Entraining Cement
11. Hydrographic cement
Table below shows different types of cement, their composition and uses:

Types of Cement
Composition
Purpose
Rapid Hardening Cement
Increased Lime content
Attains high strength in early days it is used in concrete where form work are removed at an early stage.
Quick setting cement
Small percentage of aluminium sulphate as an accelerator and reducing percentage of Gypsum with fine grinding
Used in works is to be completed in very short period and concreting in static and running water
Low Heat Cement
Manufactured by reducing tri-calcium aluminate
It is used in massive concrete construction like gravity dams
Sulphates resisting Cement
It is prepared by maintaining the percentage of tricalcium aluminate below 6% which increases power against sulphates
It is used in construction exposed to severe sulphate action by water and soil in places like canals linings, culverts, retaining walls, siphons etc.,
Blast Furnace Slag Cement
It is obtained by grinding the clinkers with about 60% slag and resembles more or less in properties of Portland cement
It can used for works economic considerations is predominant.
High Alumina Cement
It is obtained by melting mixture of bauxite and lime and grinding with the clinker it is rapid hardening cement with initial and final setting time of about 3.5 and 5 hours respectively
It is used in works where concrete is subjected to high temperatures, frost, and acidic action.
White Cement
It is prepared from raw materials free from Iron oxide.
It is more costly and is used for architectural purposes such as pre-cast curtain wall and facing panels, terrazzo surface etc.,
Coloured cement
It is produced by mixing mineral pigments with ordinary cement.
They are widely used for decorative works in floors
Pozzolanic Cement
It is prepared by grindin pozzolanic clinker with Portland cement
It is used in marine structures, sewage works, sewage works and for laying concrete under water such as bridges, piers, dams etc.,
Air Entraining Cement
It is produced by adding indigenous air entraining agents such as resins, glues, sodium salts of Sulphates etc during the grinding of clinker.
This type of cement is specially suited to improve the workability with smaller water cement ratio and to improve frost resistance of concrete.
Hydrographic cement
It is prepared by mixing water repelling chemicals
This cement has high workability and strength