Saturday, March 5, 2016

Essential Power Tools

vintage man using drill press power tools illustration


Tools. They are what separate most of us from the animal kingdom. For a species that started off chipping rocks into spearheads, we’ve come a long way. Even post-Neanderthal era, building just about anything revolved around hand (not power) tools. As your manly elders are all too happy to remind you, even today, there are plenty of carpentry and construction projects that a hand tool is best suited for. But that’s not why you’re here.  There are far more tasks in the course of a man’s life in which power tools put hand tools to shame (or, at least make them look slower than Congress passing a budget). Plus, power tools create noise, make dust, and embody our manly DIY-conquer-all spirit.
Here’s a list of four power tool essentials, along with some background, why you need them, and what to look for when you’re tool shopping.

Cordless Drill

cordless drill close up of power tool head Image by cogdogblog
Background / Why You Need It
A cordless drill is the most essential of essentials when it comes to power tools. Without it, you’ll be looking like an Amish carpenter as you hand-bore holes at a rate of one per hour. Nothing wrong with Amish carpenters by any means, but I’ll beat their suspenders off any day when it comes to drilling holes. With a solid cordless drill, you’ll be able to tackle most drilling tasks from small pilot holes to large holes to run electrical through, and driving fasteners from dainty screws to beefy lag bolts (although you might consider an impact driver if you’re doing much in the way of the latter). Let’s be clear: there’s no such thing as a modern handyman without a cordless drill.
What to Look For
The cordless drill market is filled with compact 12v tools. They’re light, high-tech, and strong for their size. But if you’re getting a cordless, make it count and get something beefier. There are few things less manly than having your drill whimper to a stop half-way through a piece of wood. An 18v is probably the sweet spot for good power-to-weight ratio, and it can handle most of what you task it with. Companies like DEWALT, Bosch, and Makita (among others) make solid 18v models that get the job done. Don’t cheap-out on your drill; it’s a tool you’ll rely on regularly, and you’ll thank yourself in five or ten years for spending a bit more for quality now. Most high-quality 18v models will set you back about $100-$200.

Reciprocating Saw

reciprocating saw in use workshop cutting wood Image by Toolstop
Background / Why You Need It
Destruction and demolition have been man’s work for eons. Few practical tools embody the raw destructive force of a reciprocating saw (known more commonly by the Milwaukee Tool brand name Sawzall).
The reciprocating saw will cut through most metal and wood like butter. I’ve even cut down trees with one in a pinch. If you’re remodeling, demolishing, or doing plumbing or electrical work, a reciprocating saw will get you through 2x material, pipes, etc. in no time. Just don’t cut through a wall without knowing what’s inside it; a severed live electrical or water line is no fun.  Both electrical and water together is even worse.
What To Look For
Unlike the cordless drill, corded is recommended here. Sure there are some pretty beefy cordless versions, but if you have to have one, we think corded will serve you best. It never runs out of battery and most reputable brands and models have plenty of power. Some models have rotating handles which can be useful in certain cutting situations, but for most, it’s not a necessity. The venerable Milwaukee Sawzall and Porter Cable are our personal favorites. Expect to spend around $100 for a decent saw. Blades are also critically important. Get a good assortment so you can handle whatever manly jobs come your way.

Oscillating Multi-Tool

milwaukee oscillating multi-tool in use cutting flooring Image from Toolmonger
Background/Why You Need It
I won’t call it dainty, but this is definitely the least gritty of our power tool suggestions. You’re not going to wow the ladies strutting into the room with one of these (at least not until they see it in action). If you’re not already familiar with them, an oscillating tool features a long, slender body (which has natural man-appeal), and a head that accepts a variety of attachments for detail sanding, grinding, grout removal, wood cutting, scraping, etc. The beauty of the tool is that the accessory oscillates just enough to make quick work of many small jobs without kicking up a massive dust cloud. It’s the surgical scalpel of your power tool arsenal.
Up until a couple years ago, the only true oscillating tool on the market was the Fein Multi-Master. It’s a fantastic tool, but also has a reputation of being a spendy tool with very spendy accessories. Then Fein’s patent expired, and the renaissance of multi-tools exploded. Just about every major tool manufacturer now has at least one oscillating tool on the market. What used to be a splurge item, has now become so common and affordable, it’s really an essential. While you may at first wonder what you’ll use the tool for, you’ll soon find yourself reaching for it regularly (and marveling at how you survived without it).
What to Look For
This market is changing so fast, features and new models are popping up seemingly hourly rather than yearly. We again say go with corded unless a cord will be a massive pain for your intended uses. Battery life and battery swapping can be a major annoyance on longer projects such as sanding or grinding. OIS (Oscillating Interface System), put out by Bosch, is becoming somewhat of a standard when it comes to accessories. Bosch, Skil, and Milwaukee tools, among others, directly support OIS. Fein remains the cream of the crop, and their quick-change mechanism is still a stand-out feature (although Porter Cable recently released a quick change feature on their multi-tool). Fein and Skil are also the only two that currently come to mind for dust collection support, which can be very useful, particularly on sanding projects. Expect to spend between $100-$200 for most respected models.

Circular Saw

dewalt circular saw in use cutting wood protective glovesBackground/Why You Need It
When it comes to making quick work of cutting through 2x material or sheet goods, nothing compares to a circular saw. If you find yourself needing to cut a piece of wood once or twice a year, you can stick to a handsaw.  However, if your wood cutting needs are more regular, a circular saw can cut through a stack of wood in two minutes, where a handsaw might have taken ten times that. Keep in mind circ saws cut through skin and bone just as happily as they do wood, so make sure you follow manufacturer safety recommendations when brandishing this tool (and the others in this article for that matter).
What To Look For
Circular saws comes in cordless and corded varieties. If you’re cutting balsa wood for your son’s model airplane, cordless might be acceptable.  But most people cut some pretty hefty material with circular saws. If you’re going to get a circular saw, you should go straight for a corded model. Corded versions breakdown into two camps, smaller, more traditional circular saws, or more heavy-duty “worm drive” saws.  If you’re a DIY’er and have typical cutting needs, a traditional circ saw with sufficient power is all you need. Worm Drive saws tend to be popular with framers and carpenters. The worm drive saw will cut through material like butter, but they’re also heavier and tougher to manage safely with one hand.

DifferentTypes of Cement and Their Compounds

The following are the types of cement that are in practice:
Types of cement
1. Rapid Hardening Cement
2. Quick setting cement
3. Low Heat Cement
4. Sulphates resisting cement
5. Blast Furnace Slag Cement
6. High Alumina Cement
7. White Cement
8. Coloured cement
9. Pozzolanic Cement
10. Air Entraining Cement
11. Hydrographic cement
Table below shows different types of cement, their composition and uses:

Types of Cement
Composition
Purpose
Rapid Hardening Cement
Increased Lime content
Attains high strength in early days it is used in concrete where form work are removed at an early stage.
Quick setting cement
Small percentage of aluminium sulphate as an accelerator and reducing percentage of Gypsum with fine grinding
Used in works is to be completed in very short period and concreting in static and running water
Low Heat Cement
Manufactured by reducing tri-calcium aluminate
It is used in massive concrete construction like gravity dams
Sulphates resisting Cement
It is prepared by maintaining the percentage of tricalcium aluminate below 6% which increases power against sulphates
It is used in construction exposed to severe sulphate action by water and soil in places like canals linings, culverts, retaining walls, siphons etc.,
Blast Furnace Slag Cement
It is obtained by grinding the clinkers with about 60% slag and resembles more or less in properties of Portland cement
It can used for works economic considerations is predominant.
High Alumina Cement
It is obtained by melting mixture of bauxite and lime and grinding with the clinker it is rapid hardening cement with initial and final setting time of about 3.5 and 5 hours respectively
It is used in works where concrete is subjected to high temperatures, frost, and acidic action.
White Cement
It is prepared from raw materials free from Iron oxide.
It is more costly and is used for architectural purposes such as pre-cast curtain wall and facing panels, terrazzo surface etc.,
Coloured cement
It is produced by mixing mineral pigments with ordinary cement.
They are widely used for decorative works in floors
Pozzolanic Cement
It is prepared by grindin pozzolanic clinker with Portland cement
It is used in marine structures, sewage works, sewage works and for laying concrete under water such as bridges, piers, dams etc.,
Air Entraining Cement
It is produced by adding indigenous air entraining agents such as resins, glues, sodium salts of Sulphates etc during the grinding of clinker.
This type of cement is specially suited to improve the workability with smaller water cement ratio and to improve frost resistance of concrete.
Hydrographic cement
It is prepared by mixing water repelling chemicals
This cement has high workability and strength

Different type of primers

There are so many primers on the market today. Its hard to know when to use the best one. Or when to use a primer at all. Now there is even Paint and Primer in One.
Why Use a Primer? – Simple. The primer allows for the top coat to dry like it was intended to. When the topcoat dries by the liquids soaking in to the surface, the film forms basically upside down.
We split this topic into two sections. Different Types of Primers –and- Different Situations That Require a Primer.


Different Types of Primers

  • Bonding Primer – Bonding primer is great for problem areas such as chalky paint that did not totally power wash off. The only place you should NOT use a bonding primer is when the paint is peeling. Good boding primers dry in a way that they grab onto and tightly grip the surface. If the surface is already peeling the boding primer will tear the peeling paint off more. 
  • Tintable Primer – Tint is certainly not the best thing for any primer. It makes it dry too slow to perform what it actually needs to do. We always follow the recommendations of the manufacturer and cut that in half. Remember that any good primer will seal the surface so the tinted topcoat will sit on top instead of soaking in. Thus it will cover better.
  • Acrylic Primer – Acrylic prime is very high quality in many ways. It will seal, fill in cracks, and bond very well. Acrylic primer can be also kind of pricey. Previously mentioned bonding primer is also acrylic.
  • PVA Primer – Poly Vinyl Acetate – This is the primer that you can use on fresh drywall and fresh mud. It is generally cheap and ONLY works for sealing a surface. It does however take small amounts of tint very well. It is also the best and only primer for new drywall.
  • Alkyd Primer – Alkyd primer is best for water stains. It is also an oil based primer that dries the fastest for oil based primers.
  • BIN Primer – BIN Primer is a shellac based primer. It is best for drying so quick that NOTHING can soak through. However the substrate MUST be totally dry of water moisture. Best for smoke damage. **Remember to have the guy at the counter shake this product twice!
  • High Build Primer – (Undercoat) These are primers that are simply designed to fill in small cracks and holes. They are generally cheap per gallon but don’t go as far as a normal primer. One great example of a high build pime is Valspars high build primer. We apply it very thick and then pole sand the entire suface fo a beautiful finish.
  • Paint and Primer in One – This is not truly a primer and should not be used as one. Most of these paints are simply thickened with a very cheap thickening agent.

Different Situations That Require a Primer –  

  • Water Stains – Water damage is best covered up by an Alkyd Primer. Try using this out of a spray can for best results. Apply with two or three very light coats so they dry quickly
  • Patches – If there is a ton of patch work the best thing is to use a PVA Primer on the entire wall. Or if you just have a few spots try a few light coats with Alkyd Primer in a spray can.
  • New Drywall – New Drywall should always take PVA primer first. This will seal the drywall so the solvents from the topcoat cannot penetrate and crack the drywall. If the drywall job was poorly done then one or even two coats of acrylic will do the job justice. High build primers will also fill in minor defects in the drywall job but do not seal very well so a PVA would have to be used first on the drywall.
  • Smoke Damage – Smoke Damage is best covered with BIN Primer. Remember to have the guy at the counter shake this up twice. No other primer will dry quick enough for the smoke damage to not come through. PVA and acrylic primers will also work but take at least two coats to stop the smoke damage from coming through
  • Chalky Areas – Any chalky areas will need to be power washed first using TSP. What doesn’t come off can be covered with an excellent acrylic primer. The acrylic primer will bond like glue.
  • Hardy Board (Composite Wood) – This is a topic of little known facts. Most will tell you to use any primer you want. NOT TRUE. Most solvent even in water based paints will destroy the glue that holds the wood together! We only use one primer from our paint manufacture PPG Porter paints. A100 Primer. Then we go with a higher quality topcoat 
  • Extreme Color Change – For going from a dark or bright color use acrylic primer. Most color changes, even somewhat extreme, can be handled by a PVA primer
  • Bare Metals – There are many choices here. Generally they are all oil based with the exception of a few water based primers that are just OK for metal. If there is any risk of rust a rust prevention primer WITHOUT TINT is necessary.
  • Wood – Most paint manufactures make a good primer for wood. It should be a high build so it fills in cracks. Really any high quality acrylic primer should work just fine. If you really need to seal it up good go to an oil based primer.

How to remove paint from metal surface using paint stripper

 
How to Remove Paint from Metal - Furniture

“Just paint it!” That’s the motto for many DIYers when they’re unhappy with the lamp, dresser, doors, hardware…you name it. But if you’ve changed your mind more than a few times—or someone before you slapped on a sloppy paint job—several layers of paint can make any surface start to look all gummed up and unattractive. This holds true particularly for metal hardware and accessories. Fortunately, while it’s not necessarily a fun job, removing paint from metal is completely doable if you have time, patience, and the right tools. And the shiny results are well worth the effort.

TOOLS AND MATERIALS
- Cardboard, newspaper, or heavy drop cloths
- Chemical stripper
- Glass or metal can
- Disposable paintbrushes
- Paint scraper
- Nylon brush and/or scrubbing pads
- Rags
- Mineral spirits
- Water
- Rubber gloves
- Eye protection
- Respirator
     
How to Remove Paint from Metal - Painted Hardware
Photo: fotosearch.com

STEP 1
Prepare the work area by covering the ground with drop cloths. If you want to save money on supplies, recycled newspapers or unfolded cardboard boxes can substitute as surface protection against the chemical stripper you’ll be using—just make sure not to leave any gaps between pieces.
It’s just as important to protect yourself, so don your rubber gloves, safety glasses, long-sleeved shirt, and pants to cover your skin completely. Then, avoid inhalation of fumes from the chemicals by opening all windows and wearing a respirator.

STEP 2
Pour a small amount of the stripper into a glass or metal can. Using a disposable paintbrush, apply the chemical paint stripper to the metal, and let it set according to the instructions on your commercial stripper. As it sets, you should start to see the paint bubble up from the surface of the metal.

STEP 3
Take a paint scraper, and chip off the bubbled paint from all the flat surfaces of the metal. For crevices and harder-to-reach areas, switch to a scrubbing pad or nylon brush (you can use the one from Step 2, but first give it a good wash and trim the bristles short!) and continue to chip away. Reapply stripper and scrape or brush away again as needed until the whole piece is paint-free.

STEP 4
Next, dampen a rag with mineral spirits and wipe the surface down. This will remove any leftover flakes of lifted paint and the bulk of the remaining chemical residue.

STEP 5
Thoroughly rinse off the metal with water to completely remove all traces of the stripper, then wipe it down using a fresh, dry rag. And with that, your newly cleaned metal is ready for use! Go ahead and screw hardware back into place, or set out those shiny, fresh-looking metal tables. If you’re looking to place a metal piece outdoors, now’s the best time to apply a weatherproofing sealant.

Below there is a video tutorial on how to strip the paint from metal surfaces:


Video : Tips on how to paint the bathroom tiles

Probably many of us are wondering how to remodel our bathrooms and give it a fresh look. Well, that is possible by painting the tiles, since we cant really move the toilet or bidet around the toilet!. painting the bathroom tiles could be tricky, so if you want to make a successful make over of your bathroom, just watch this video and follow it accordingly. Kumpulan Hardware wishes you a successful painting time! GOOD LUCK!!


Friday, March 4, 2016

Whats the Difference Between Varnish, Polyurethane, Shellac and Lacquer ?

CI-Fox-Chapel-Publishing_oak-dresser_s3x4

CI-Fox-Chapel-Publishing_oak-dresser_s3x4

The ravages of time and use of a piece of furniture can be limited by a durable top or finish coat. While the terms varnish, polyurethane, lacquer and shellac are commonly used to reference a final finish in general, these products are not the same, nor are they recommended to be used interchangeably.

Shellac

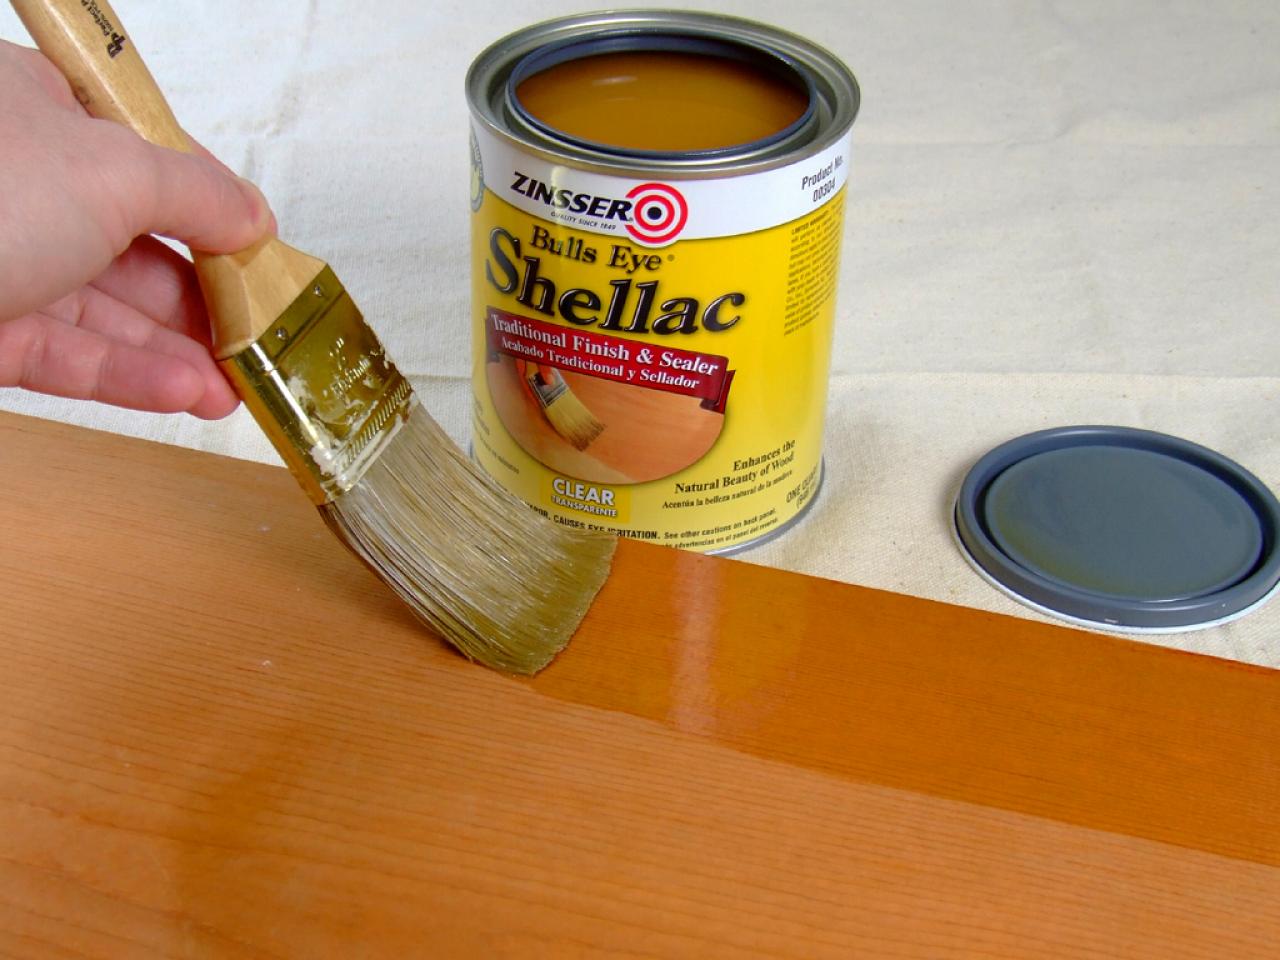
This finish is actually a natural product (it's made from combining a secretion from the female lac bug with a solvent such as alcohol) that is very safe once dried and hardened. In addition to adding a protective coat, it also can add a warm amber color to wood. It can be affected by heat (white rings will appear under a hot bowl or mug) or chemicals, so a kitchen table might not be the best place to use it. Fine furniture items can be greatly enhanced with shellac. Some shellac manufacturers recommend using it as a protective coat on non-wood items. Apply it with a natural bristle brush or with a cotton rag.
Shellac is available in most home centers as a liquid in a can. It also comes in solid form or in flakes that must be dissolved, and it has a shorter shelf life than other finishes. The liquid variety is the best option for the average homeowner.

Polyurethane

Essentially a plastic in the form of a liquid until it dries, polyurethane is available in both water- and oil-based options, and comes in varieties from satin to glossy.
Water-based polyurethane is popular because of its low odor and low toxicity. It goes on clear without adding a slight color that oil-based versions can, and it dries much faster. As with shellac, water-based polyurethane won't hold up well to heat and chemicals. It's good for bookcases, desks, side tables and picture frames — anything that won't be exposed to extremes.
Minwax Polycrylic is an example of a fortified water-based polyurethane than can stand up a bit better to rough conditions. It also can go over oil-based finishes and can be applied using synthetic-bristle brushes, a foam roller or a rag, as can other water-based polyurethanes. Water-based oil-modified polyurethane is a relatively new product that combines the durability of an oil base with the cleanup of a water base. This product can actually be used on wooden floors.
Oil-based polyurethane is slightly more durable than water-based, especially when it comes to handling heat, so a kitchen table is a good candidate. It adds a slight color tone and will bring out the richness of wood.
When working with oil-based polyurethane, use a respirator in a well-ventilated area. Apply using a natural-bristle brush or rag. Oil-based takes much longer to dry and cure than water-based, so plan accordingly and follow the manufacturer's directions.
Both oil- and water-based polyurethane can be applied to latex/acrylic paint; however, oil-based polyurethane will create a yellow or amber hue, especially to light colors. To add durability without affected color, use a water-based finish.
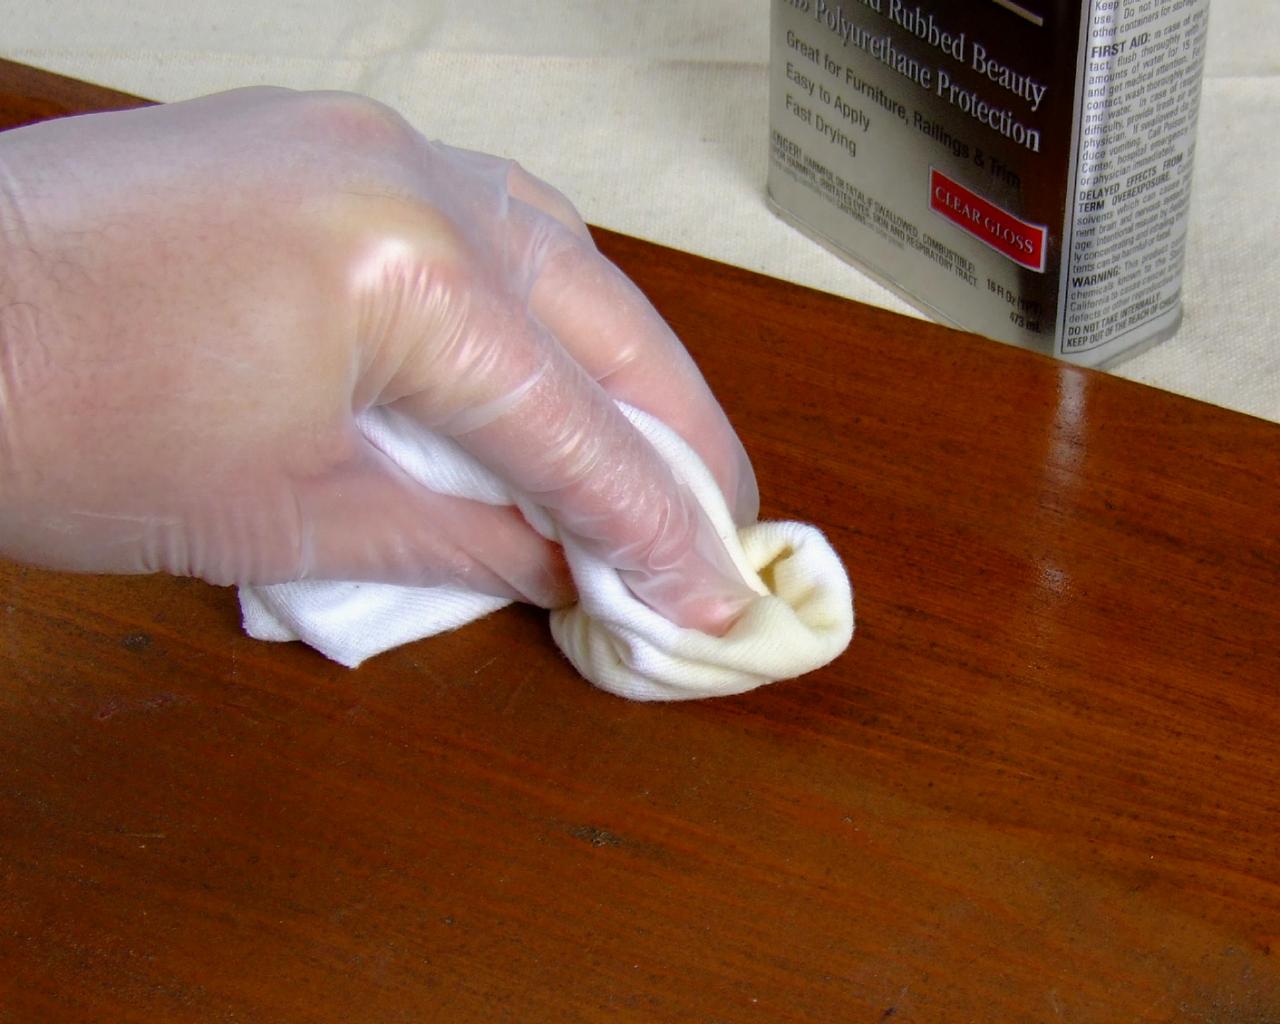
You can also purchase polyurethane in a spray can which makes it a bit easier to apply, especially on large projects. Wipe-on polyurethane is used primarily by woodworkers who want to create a “hand-rubbed” finish on special projects. These two run the extremes of ease of use, but produce excellent results.

Varnish

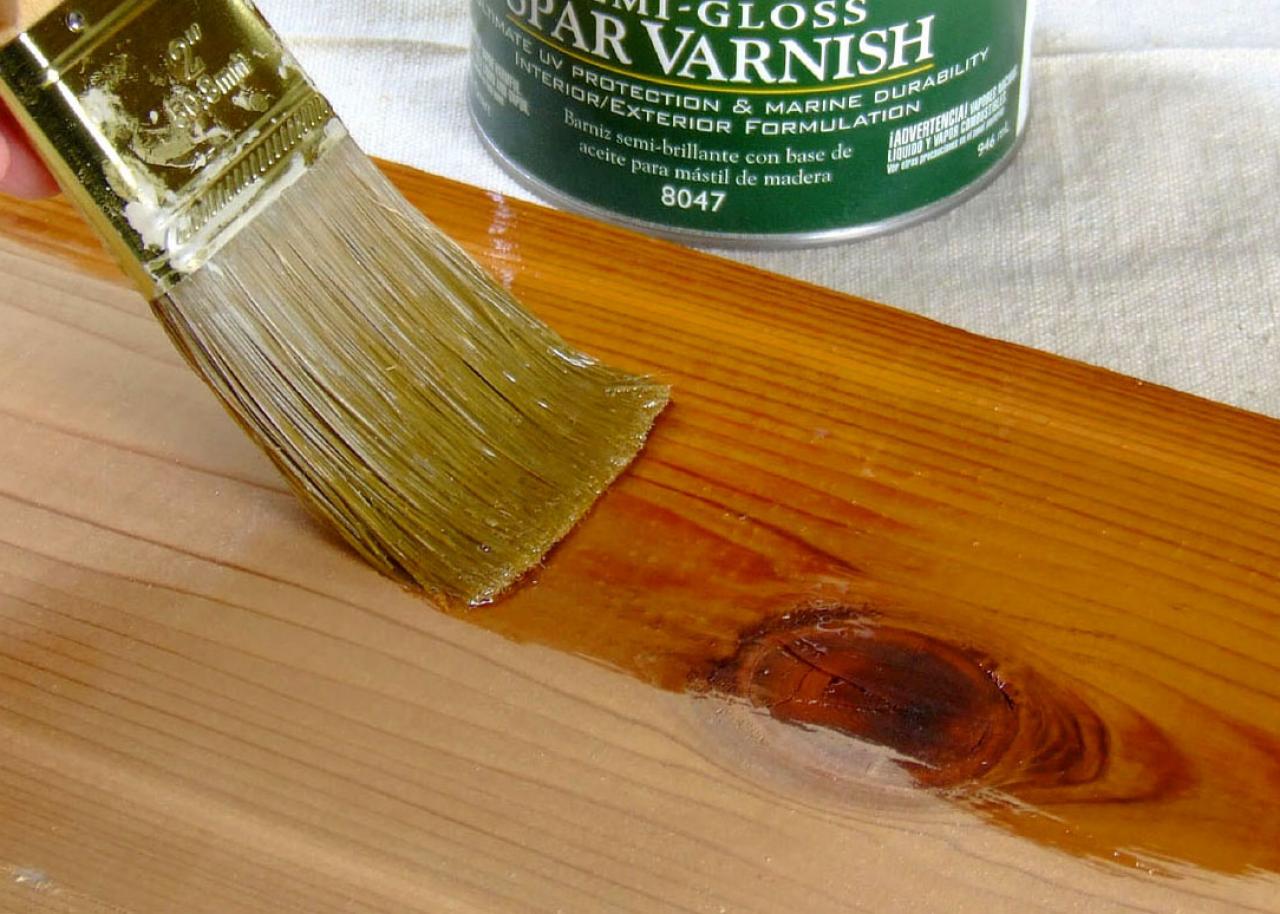
The name of this finish often is used generically for a finish or top coat. It's very durable because it contains a higher ratio of solids. Spar varnish is perfect for outdoor projects and for raw wood used for exterior doors and trim on rustic homes. In addition to protecting the wood, it also provides natural ultraviolet light protection. Spar varnish is often used on items that will be near or on the water, like a wood boat, decks, beach chairs, etc. Apply using a natural-bristle brush.

Lacquer

Lacquer provides the extremely intense gloss finish often used on many Asian-inspired or ultramodern furnishings. It is extremely durable and resistant to damage; however, over time it can begin to discolor and become scratched. Wonder why it's so smooth? It's applied via a sprayer, because it is more viscous (thinner) than the other finishes. You'll need a high-volume, low-presser (HVLP) sprayer and a well-ventilated and spacious workspace to apply it.

Other Finishes

Cutting boards and other wood items that come in contact with food do well with butcher-block oil and food-grade mineral oil. Wooden tool handles will hold up better with an annual rubdown with boiled linseed oil.

A Few Words About Applicators

The general rule of thumb is to use natural brushes, sometimes referred to as China brushes, for all oil-based finishes (including paint), and synthetic brushes, sometimes referred to as nylon brushes, for latex, acrylic or water-based finishes. Rollers and rags can work for either type of finish.
Because these are the top coats being applied, you'll want them to look as good and as smooth as possible. The best conditions to apply are when there is as little dust or other airborne particles as possible. Clean your work area as thoroughly as possible and allow some time for the dust (literally) to settle. Consider using a dust collection system or air purifier.
When applying a finish with a brush or roller you may notice some bubbles pop up. Don't panic. Many times these will settle out as the finish dries. If it's a problem, simply use a rag to wipe it down. You can often avoid this by applying a thinner coat. Also, shaking a can of finish will certainly add bubbles, so try stirring instead.
After the first coat dries, you'll need to either sand it with fine-grit sandpaper (220 grit) or use steel wool. You may have heard to only use steel wool, but many manufacturers recommend either one. Just be careful not to deeply scratch the finish and certainly do not sand off the finish to the point where you reach raw wood. Wipe off the dust created and apply another coat. A couple of coats are usually enough, but you can apply additional coats (more wiped-on coats can be applied than brushed or rolled) to create a thicker and more durable finish. Try not to exceed four or five coats of finish.

The Magic of Nippon Momento !


CREATE IT YOURSELF


We’ll be looking at how to create two feature walls in this CIY project: one for living halls & another for sofa walls.
It’s important to be creative when it comes to expressing your personality at home. Let’s go through how to
create artistic ambience in both spaces. The design theme here is modern contemporary, with all clean
neutrals and single pops of colour.


Sofa Wall – Feature wall
This sofa wall needs a more interesting colour – so some repainting on this wall will be required with a brighter colour and then to enhance it with a special glaze. Nippon Odour~less AirCare will be used as a base colourhere and then we will enhance the wall with Nippon Momento™ Frost – to lend this wall a special effect.

BEFORE


AFTER


Recommended Colour Schemes:


Living Hall - Feature Wall
 Creating an interesting coloured panel is easy using Nippon Momento® Sparkle Silver Reflections. All you’ll need is some masking tape, a panel, paint tools & Nippon Momento® Sparkle Silver Reflections.

Here’s a Step-by-Step guide to achieve this look:

1. First, we’ll create the outline or shape with
masking tape
2. Then we start painting the area, with criss-cross
motions
3. Continue until we bring out the texture of the
paint
4. Complement with decorations to make it
pop!


Recommended Colour Schemes: