This is the official weblog of Kumpulan Hardware Sdn. Bhd., Here we will post wide variety of content including : DIY, hardware education and also the latest promotions by our company. We believe that promoting "Do it Yourself" could help you be skillful, therefore we strive to have a better society.
When electricity passes through a wire it wastes a part of the energy it carries by creating heat. Electrical wires get hot. If too much electricity flows then wires can get very hot and melt. If a wire or appliance is supplied with too much electricity its parts may not be able to withstand the power – parts melt and can break or worse cause a fire.
However this heating effect actually provides one of the most basic and important safety features to our domestic power supply – THE FUSE.
Fuse Design
The image below shows a simple fuse with the external label removed so you can see inside. It is a thin wire in a a tiny glass case. The fuse has metal ends that connect to the mains electricity in the plug.All the electricity has to pass through this fuse wire to reach an appliances power cable. If the wire in the fuse gets too hot and melts the electricity cannot flow into your appliance. This is just like unplugging the item.
If too much power flows through the socket into the appliance ( power surge or mains power fault) the fuse will melt protecting the appliance from damage and making sure it does not start a fire.
If the appliance tries to draw too much power the fuse will also melt. The appliance might do that if it is dropped into a bath or develops a fault or is a toaster that someone has stuck a knife into! In this case the fuse will protect the users from getting a dangerous sock.
Fuses have different amp ratings. The amp rating tells you how much electricity they can take before they melt. Typical ratings are shown in the image below.
Each of your appliances will also have a similar rating so you should match the fuse in the plug to the appliance. You should never put a higher fuse in a plug that the appliance requires – this is unsafe and can result in your appliance breaking.
One Time Use
Once a fuse has melted it has to be thrown away and replaced by a new one. If one of your appliances has stopped working, unplug it and check the fuse is still intact before you throw it away. The diagram below shows an intact fuse and one that has melted. Notice you can’t see the wire just a lot of soot in the one that has melted.
If you can see any soot inside the glass case then you need to replace the fuse. If the fuse in a particular place keeps melting you should get a professional to check the appliance as it is likely to have a fault.
A fuse is fitted to the plug of your applaince. ALWAYS unplug your appliance before you mess about with the plug. Unscrew the underside of the plug and the top will pop off revealing something similar to the picture on the left. Fuses just slot into a small copper bracket in each plug. Gently leaver the old fuse out and then gently press your new fuse into place.
Carefully align the top back ove the plug and then rescrew the base to the top.
there are times in our daily life where we need to use an electrical appliance, but due to low quality or over using the item, the plug could malfunction. however, this is not the case for the UK plugs you find here in Kumpulan Hardware, our quality plugs with give you the confidence of long life and reliability.
UK plugs are easy to assemble and the only thing you need to know is the color codes and which wire belongs to which pin. The illustration below will show you the right placement of wires inside the plug.
There will be a single power cable that leaves each of your electrical appliances and ends with a plug. This cable is actually composed of three separate wires individually wrapped in a different coloured plastic. These three inner wires are then tightly wrapped together inside a single white or black plastic insulating cable.
To help you remember where each coloured wire should go think about the second letter of each of the colours blue goes left, brown goes right and striped goes to the top. The video below will give you a tutorial on how to change the UK plug.
It could be challenging for some of us when it comes to use professional tools safely. Drills are the kind of electronic appliances which could make our life much easier and speed up the process of our projects, however, if we have limited knowledge about their ability and limitations, we may feel frustrated and consequently, prolong our effort in advancing in a project.
Any DIY’er knows that the right tools make jobs much easier, safer and neater. Some of us are lucky enough to have a parent who has the knowledge and enthusiasm to pass on their power tool skills. The rest of us are on their own! If you have never used a particular tool before they can be very intimidating. How do you know which one to buy and what the heck do you do with it once its home?
One of the most essential and versatile tools of all is the power drill. The diagram below shows you the most important parts. Basically you work out which is the right type and size of drill bit to use, attach it, make an indentation in the surface for the end of the drill bit and off you drill. There are sections on rawl plugs and drill bits at the bottom of the article.
The drill bit is the threaded metal end that actually forms the hole. There are different types of drill bits. Nearly every drill comes with a selection of drill bits but they are usually low quality. One of the first things you learn is better quality drill bits make drilling much easier and neater.
The chuck is a rotating clamp that holds the drill bit in place. Some drills need a ‘chuck key’ to loosen or tighten this; other drills have a manual release. Loosen the chuck; insert the drill bit into the opening. Stand the drill up so the drill bit is facing directly upwards and is straight. Tighten the chuck so it firmly grips the drill bit, make sure it is straight. Make sure you remove the chuck key before you start the drill. Drills will come supplied with their own chuck key.
A drill may or may not have a torque and/or speed selector. These are used to adjust the drill for different materials. Using the correct settings reduces wear on the tool and also makes the job easier and neater. Check the drill manual to find out which settings to use.
Choosing A Drill
A basic drill will allow you to drill holes in materials like doors, plasterboard and window frames. It should also have settings and attachments so you can use it as a power screwdriver. To drill into hard materials like metal and brick you need a drill with hammer action or even SDS (special direct system). SDS drills are really for professional jobs – they can take larger drill bits and be be used for chiselling through concrete and punching through thick walls.
You should decide if you want a cordless or corded drill. Cordless drills are more portable so if you want to drill things at the bottom of the garden or away from a power source you really need one of these. They tend to be lighter and easier to handle making them better for a novice and for jobs that involve balancing or holding the drill upwards or at an angle. They rely on their battery to provide power and for that reason buy a brand with a good battery. Poor quality batteries might not last long (they can be expensive to replace), run out of power quickly and need to be recharged regulary all of which can make using the drill a pain. But modern quality batteries will last for ages, charge quickly and hold their charge for days if not weeks. Some cordless drills just are not powerful enough for masonry and metal but as most of us live in modern buildings we don’t need this ability. The voltage of the drill tells you how powerful it is. An 18V drill is a good choice for a general household drill.
Corded drills draw their power directly from the grid so they are more powerful and can provide features that are hard to deliver in a cordless device. They tend to be bigger and heavier – make sure you test the weight. Can you safely hold and angle the drill? If not, don’t buy it as you will not be able to operate it safely. For corded drills the power is given in watts. For most homeowners the power of a corded drill is not need and their weight makes them hard to use. But if you have on old house and you need to drill into bricks, stone or metal you will really need one of these.
You should be looking for a variable seed drill with a reverse gear. The reverse gear makes it useful as a power screwdriver and helps you withdraw the drill bit from some materials. The variable speed options make it easier to use the drill on different materials safely. These days you should be able to get a decent drill cheaply that has both these options – don’t be tempted to go for the cheapest drill with the least options. You will regret its lack of flexibility.
It’s really important to pick a drill that you can grip safely and comfortably and that feels well balanced in your hand. This really does make a difference to how neat your jobs will be and how safely you can handle the tool. If you are buying a cordless drill I recommend choosing one that will stand up on its battery. If you have an unstable drill or one that has to be laid down; you are likley to drop it or just get immensely irritated having to constantly find a safe place to pop it down during your DIY.
It’s useful to choose a drill with a built in spirit level so you can make sure your holes are true. Depth stops are useful to make sure you don’t drill though a surface and that your hole is deep enough for a rawl plug.
We also recommend thinking about buying your cordless drill from a range that has a single battery and charger that can be fitted to multiple tools. The battery and charger are the most expensive and heavy elements. If you only need one of these you can buy lots of different power tools like saws, routers, sanders, staplers, nail guns….. Just charge the battery and select the tool you want to use.
Safety Pointers
Remember that water, gas and electricity pipes and cables might be running under the floor, ceiling or walls. If you don’t know where your cables and pipework run consider buying a tool which will sense where they are before you drill.
Loose clothing, necklaces, scarves and long hair can easily get caught in the rotating parts of a drill so be sensible and make sure your hair is tied back and loose clothing or jewellery has been removed.
Goggles should be worn. I know – every tool handbook says this from a toothpick to a forklift trck. But drills create dust, alot of dust, hot dust, alot of very hot dust which can burn your eyes.
The drill bit gets hot, very hot. Give it time to cool down before you try and change it.
Remove the chuck key before using the drill – unless you want a heavy metal object flying at great speed into your face or surroundings.
It is hard and unsafe to drill into a flat surface. For slippery surfaces such as tiles put some masking tape over the area first. The tape will help the drill bit stay steady while it perforates the surface of a tile. If you don’t tape the area first you risk the drill bit sliding over the tiles injuring you, scratching or breaking the tile. For other surfaces use a screw or nail tip to make an indentation for the tip of the drill bit. Always start to drill slowly applying gentle pressure. As the drill starts to bite, gradually increase the speed and pressure on the drill. This will prevent the drill jumping and should produce a neater hole.
Rawl or Wall Plugs
Rawl Plug and Screw
These are usually made of plastic and they help to transfer the weight of an object (to be hung by a screw) into the wall or other surface. The rawl plug prevents the surface crumbling and the screw falling out – along with the object! In most domestic situations where you are drilling into plaster board or masonry rawl plugs are essential – you can’t just drill a hole and screw directly into it. Instead a rawl plug should be gently pushed into the drill hole and a hammer used to gently knock it all the way in. Then the screw is screwed into the rawl plug, see left.
Once you have screwed into the rawl plug check it is secure – if the screw can move around in a circle or falls out of the hole you need to start again. If the hole is too big choose a bigger rawl plug and screw. If the surface has disintegrated move a few inches and drill a new hole.The size of the screw, rawl plug and drill bit are important and should be related to each other. Start with the screw, then choose a rawl plug to match – it will be just a little bit wider than the screw. Then choose a drill bit just a little bit wider than the rawl plug. The idea is to be able push the rawl plug into the drill hole without using too much force but the hole should not be so large that there is clear space around the rawl plug. You will often find that the screws and rawl plugs that come with shelves or TV brackets are small and poor quality or none are supplied. Every DIY’er should buy some decent quality general purpose screws and rawl plugs in a range of sizes. All DIY shops sell these in compartmented buckets. So buy a bucket and you will have no trouble finding a screw and matching rawl plug suitable for any job.
If you need to remove a rawl plug from a hole you should screw in a screw a few turns and then use your hand or the claw end of a hammer to pull out the screw and rawl plug together.
Drill Bits Matter
Don’t be tempted to buy the cheapest ones or to use the same bit for every job. First of all you need different sizes for each rawl plug. Secondly you need certain types of drill bits for each different material – wood, metal and brick need specific drill bits. If you don’t use the right drill bit you could damage your drill, end up with a crumbling useless hole or give yourself a coronary trying to force the drill bit into a material that’s too hard for it.
Masonary drill bits are for bricks and breeze blocks / Wood drill bits are for….well wood and have pointed ends / Countersink drill bits drill a hole and make an indentation for a screw head and help prevent wood splitting when screws are tightened / High speed steel (HSS) bits are for drilling into metal and are black / Wood Spade or Paddle bits look like spades and are for making large diameter holes in wood / Only SDS drill bits should be used for SDS drills or on SDS settings / Special drill bits should be purchased for tiles, ceramic tiles and glass. / Screwdriver drill bits can be used to use the drill as a power screwdriver.
Most drills will come with a set of drill bits of different sizes. It is often worth buying better quality drill bits – you really will notice the difference.
Painting a room could be tough specially for someone who doesnt do it on a regular basis. Here at Kumpulan Hardware we have both expertise and materials to guide you over a successful house painting session. How do you paint a room – just open the tin, grab a brush and slap it on I hear you say. Well actually no. You will get better results, with a longer lasting finish and not get paint all over your furniture, windows and skirting boards if you follow a few basic steps.
Prepare, Prepare, Prepare!
One of the most important, but often over looked, steps is preparing the area you are going to paint before you start. To a novice it might seem to be a bit of a faff, but anyone who has painted a few times (and attempted to clean up afterwards) knows it will actually save time in the long run. It will also give you a much neater finish and your room is less likely to look like a couple of 5 year olds have gone to town on it. These are things you need to do to prepare;
You need to space to work so that means moving furniture away from the walls. Do not paint around furniture because if you want to replace or move the item at a later date you won’t be able to fill in the gaps without this being obvious. If you don’t give yourself plenty of room to access the walls you will be contorting yourself while you paint making spills and paintbrush slips much more likely. If you can’t take all the furniture down pile it in the center of the room and cover it with a dust sheet.
If you have pictures, ornaments, shelves or wine racks on the wall it is also a good idea to take them down before you start. In many cases this will be quicker than trying to paint round them and clean off paint.
Dust the wall with a brush, cloth or vacuum. Wipe the dust of skirting boards. Don’t skip this step otherwise you will get dust clumps in your paint that discolour and lump up your nice new paint. If the walls are greasy (for example in an old kitchen) then you will have to wash them with a detergent – if you don’t your paint will not stick tot eh walls giving you a patchy finish that quickly peels off.
If your walls are mouldy then you need to kill the mould and bleach the wall. If you don’t; the mould will quickly grow through your new paint staining it again. Wipe over the mould with a medium strength bleach solution (remember to protect carpets and furniture before you do this as the bleach will ruin them). If the room is damp then buy a special anti-mould paint.
Choose the Right Paint
The paint that you choose is very important, as not only does the colour have to be right, but you have to choose the right type of paint for the job. Emulsion paint is designed to be used on walls, while gloss paint is best for woodwork or metal, such as radiators. You can also buy special metal paint and also types of paint more resistant to high temperatures for radiators or around fires.
You should also think about paint patterns or effects as this can add a lot of interest and help overcome some of your rooms limitations. For a bit of inspiration refer to Martha Stewart’s guide. If you are undecided about the colour to choose refer to our articles on colour theory or choosing a colour scheme.
You can pick up paint from nearly anywhere these days but remember that you do get what you pay for. If you want good lasting coverage with one coat you can’t buy a cheap paint. So nip to your nearest industrial estate or simply drop by the Kumpulan Hardware Sdn Bhd. for the best deals.
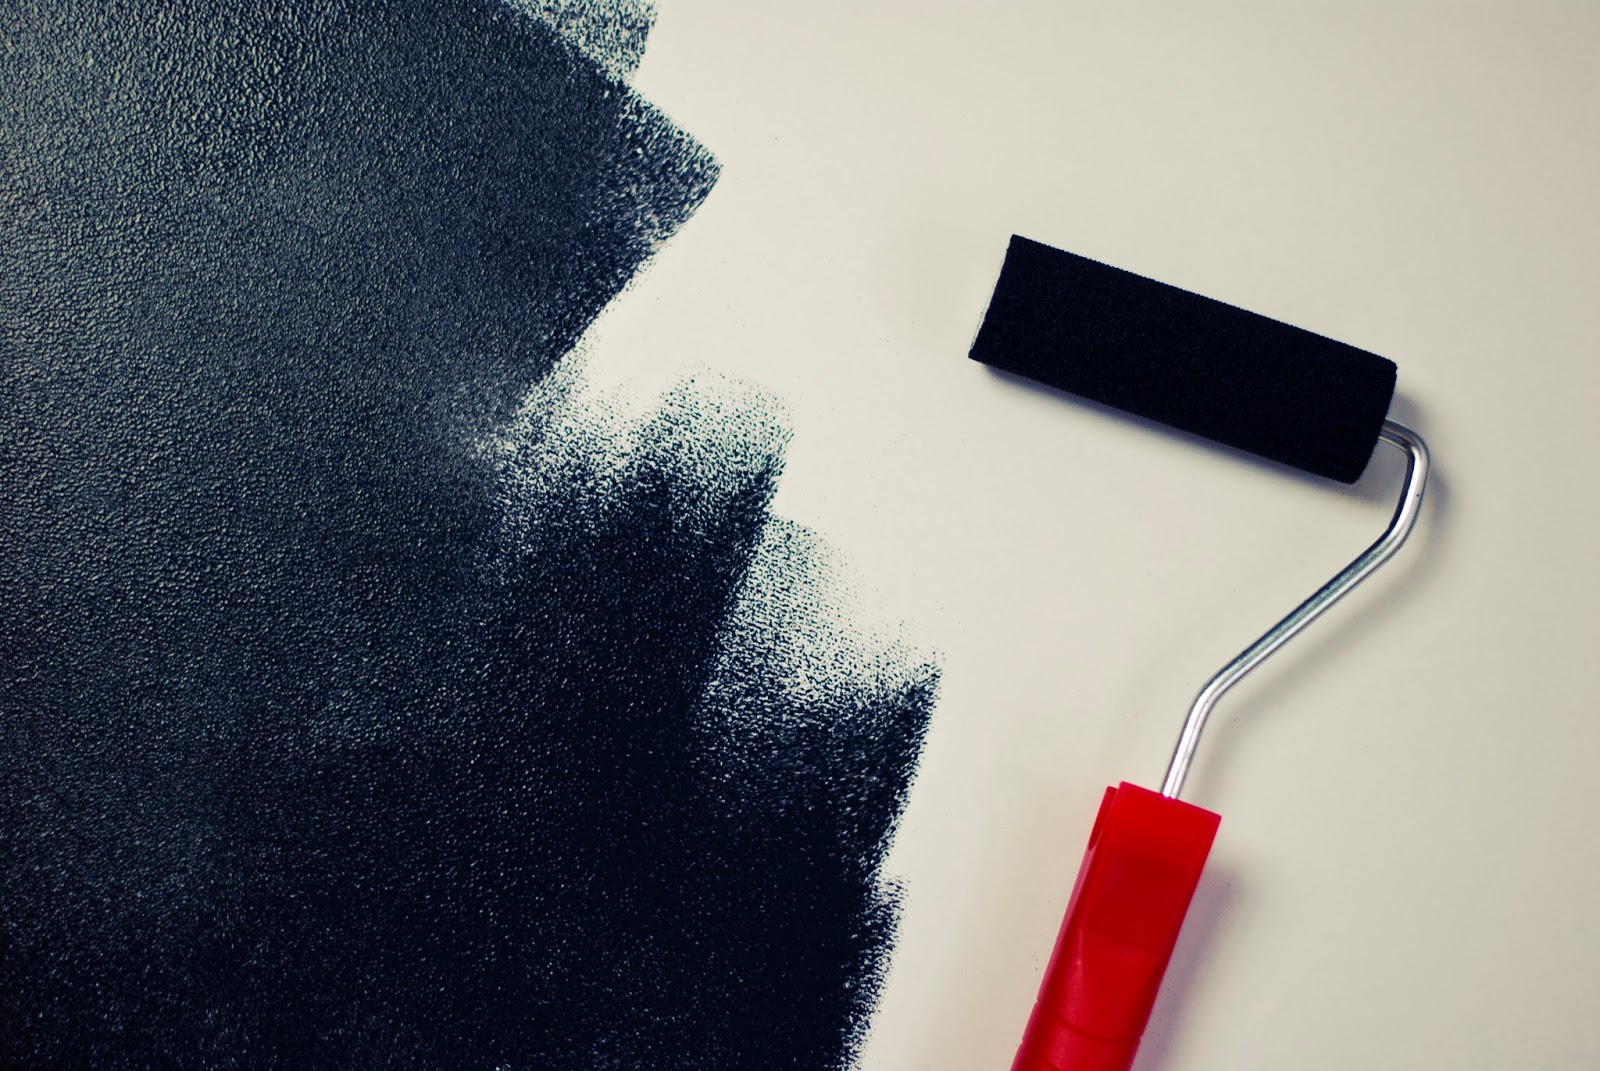
Paint Brush or Roller?
In general small areas are easier to do with a paint brush. If you have a large area to paint, invest in a roller as it will save you a great deal of time and hand cramp. You can also buy extendable handles for rollers allowing you to reach the top of high walls or ceilings. Ceilings are very hard (and incredibly messy) to paint with a brush. Note that the texture of the paint will be different if you use a roller or a brush. With a brush the texture is quite flat but a roller will give a slight stipple effect. Also be aware that rollers are quite messy – they shower you and the ground underneath the wall with tiny droplets of paint so make sure you have covered all the exposed areas with sheets and tape before you start.
Even if you use a paint roller, a paint brush is still an absolute must-have as it lets you paint around detailed areas freehand, such as light switches, along skirting boards and doorways in a process known as ‘cutting in’. This allows you to carefully work around these areas and avoid making a mess with a roller.
If you have never used a roller before take a quick look at this video which will go over the best technique.
Protect yourself
Painting is a messy job, so make sure that you wear old clothes and shoes that you don’t mind getting covered in paint. Some DIY shops sell boiler suits and painter’s bibs that are designed to protect your clothing and can be used again while others sell disposable plastic aprons and paper suits. You will get paint in your hair. Consider tying it up and covering it.
Stir
Make sure that you stir your paint really well before you start. Paint separates over time and the top will be really thin and the stuff at the bottom of the tin thick. So stir, stir, stir -until the paint is of an even consistency. Or you can ask our staff in Kumpulan Hardware to shake the paint before you take them home!
Have A Wet Rag Handy
You will spill paint and/or paint things you didn’t want to. Make sure you have a wet rag at the ready to wipe up mistakes. It’s best to wipe it off straight away before it has time to dry. If you are using an emulsion (water based paint) then a rag with water on it will do. If you are using oil based paint then you will need a rag soaked in turpentine or paint remover.
Adopted from an article from: http://www.diy-tips.co.uk/painting-a-room/