This is the official weblog of Kumpulan Hardware Sdn. Bhd., Here we will post wide variety of content including : DIY, hardware education and also the latest promotions by our company. We believe that promoting "Do it Yourself" could help you be skillful, therefore we strive to have a better society.
I always had problems with the plugs everywhere I go. I do travel a lot around the world and simply traveling around Asia can bring you a lot of confusion. Let me show you and example;
It is just raging how many plug heads you need to carry with yourself everytime you travel to other country. Even here, In Malaysia, everytime I buy a product from China or some other imported goods, I see the face of disappointment once I unwrap my package... Why cant they just make a universal plug ?!
this thought sparked an idea in my brain, to actually go and look for a universal plug which every product could be connected to it. I was very surprised that there is such product at cheap price when I checked in Kumpulan Hardware, in Kajang business district.
Here, take a look at the product :
That is indeed a complicated looking device. Well, not really! it made my life much more easier while I'm traveling around. However, after I used it for a while I found out that there is a SECRET CHAMBER inside of it!
Here a picture from my discovery:
Yes! it does actually split into half so you can use it as a China plug. I found out by pressing the two "Release" Button on the side of the plug and it just came off. I have to admit in terms of quality and reliability this product is really exceptional! The reason is, I had terrifying experience with the 2 pin plugs. Yup, you guessed it right! the SPARK! every time I see my life flash in front of my eyes when I see the spark ( yeah, I know that's quite exaggerating, but admit it, its scary). By the time I started to use this plug there are no more sparks from the plug and I can continue living a happier life while I'm on travel.
In addition to all these awesome features, there is an additional function that differentiate this product from the other products, THE MIGHTY USB PORT! yes now I can charge my laptop, my phone and my iPod at the same time, which is nice!. However, recently I was thinking about how good if I could have these USB ports all around my house too. Although I haven't implemented this plan but I have already spotted this good looking electric plug with TWO USB ports installed on it. Its like my dream comes true!
Here have a look at it:
Since I already have the universal plug and this wall plug I guess I need to forget about the different plug adaptors and just carry either one of these wherever I go. So, If you think you have the same problem with me, just head down to Kumpulan Hardware and ask our friendly staff to show you one of these awesome plugs!
See Y'all !
I've realized that, buy simple things like brush or screwdriver way more than they buy power tools, maybe its because of the higher price, or maybe the usage. Whatever the reason is, I think every house deserves a good power tool to serve the family. Somehow investing in a good power tool could save so much in future, both in hiring professionals and buying hardware tools.
Here in Kumpulan Hardware we have many many power tools, the main problem we have faced with the customer is that they don't know what power tool is appropriate for what type of work. So, I have decided to introduce some of the power tools we have here in Kumpulan Hardware and their technical specification.
-Bosch GHG 630 DCE Heat Gun
Alright, I think Bosch heat gun is a major game changer in power tools market. with up to 2000 W of power and only 0.9 Kg is one of the best in its category. If I want to list down the functions of heat gun, I have to dedicate a whole post to it. Different types of heat gun operating at different temperatures and with different airflow can be used to strip paint, shrink heat shrink tubing, shrink film, and shrink wrap packaging, dry out damp wood, bend and weld plastic, soften adhesives, and thaw frozen pipes.YES! that's only a part of their function, so make sure to choose the right heat gun for your project, our recommendation is definitely Bosch heat gun! Always!
-Bosch GWS 750 Angle Grinder
This monster can give an output of over 750 W and 11000 RPM non load speed, with maximum 100 mm disk diameter for only 1.8 Kg. Angle grinder could be used in cutting, grinding and polishing objects which is pretty much a DIY workshop by its own! The Bosch Angle Grinder has an ergonomic design which fits perfectly inside your hand and has an auxiliary handle which will increase the accuracy of the machine. I personally like the angle grinder because I always use it to polish my car with it and the result is much better than what the car wash service do for me.
-Bosch GKS 235 Hand-Held Circular Saw
This is the bad guy of the Bosch products! 2100 W of power input and 5000 RPM non load speed could cut through 85 mm when its held at (90°) and 65 mm with it is held at (45°). With a saw blade bore of 25 mm and blade diameter of 235 mm could lightly suggest you that there is nothing stronger than this guy! it can cut literally through anything and its one of the popular power tools among professionals.
- Bosch GMR 1 Palm Router
Maybe the palm router is more famous among the carpenters and wood workers, they are light weight, and could be used by using only 1 hand. The palm router is used for light cutting and design and is not suitable for heavy cuts. The reason is, you never kill a tiny mosquito with an elephant gun! sometimes,some projects require a very accurate cut and you just cant simply use bigger electric saw or other types of cutter. Bosch Palm Router is 550 W powered which can go up to 33000 RPM non load speed and its only 1.5 Kg in weight. This machine is truly a powerful artist in its own category.
- Bosch GLL 3X Line Laser
The laser liner is a replacement of traditional liners which were usually were a long string of thread or drawn on the surface manually. this product has greatly increased the efficiency of alignment specially for the projects which requires high levels of leveling accuracy. This device uses laser technology to give an accurate straight line level for various types of projects (not necessarily aligned with the horizon). this device has great mobility and uses AA batteries to function. since laser consume very little power and also the device consume very little power due to its efficiency, it long last in the long projects (but always have an extra pair of batteries, just in case).
-Bosch GST 65 Jigsaw
A jigsaw power tool is a jigsaw made up of an electric motor and a reciprocating saw blade. A jigsaw with a bevel function on the sole plate allows cutting angles of typically up to 45 degrees relative to the normal vertical stroke for cutting miter joints.Jigsaws are perfect to cut out shapes from wood, steel or aluminum but they have different penetration functions. a jigsaw with a standard size of blade could cut 65mm inside the wood, while it penetrate 12mm in aluminum and 3 mm inside steel.
So, this was a part of what I could say about some of the most famous power tools, and of course, I will post more about the power tools if I can, but for the time being I guess this would be satisfying. We do offer all these tools here in Kumpulan Hardware, so remember if you need a power tool you can head down to Kumpulan Hardware and ask our friendly staff regarding the power tools and their functions.
Kumpulan Hardware just announced its stock clearance for the Colourland Powerflex exterior paints. I think this is an awesome opportunity to paint our house chalky walls after long time. Being in Malaysia gives us the advantage of changing the exterior wall call every once in a while.
We have already posted an article about different issues with the wall and how you can overcome them previously, just in case you missed reading it, you can refer to it here .
Colourland paint been around since 1999 and started in Johor Bahru , they are one of the biggest suppliers of paint in Malaysia with more than 2500 dealers all around the nation. their high quality and relatively lower cost per project made them one of the top choices for contractors and casual consumers.
with this being said, we have a pile of awesome-filled beautiful paint here in Kumpulan which is ready to head down to your houses and give a new color to your lives. since it is heavily discounted, its being sold very fast, although we didn't really advertise them. Colourland paints have wide spectrum of color, mostly bright colors, and can make the environment look more spacious and lively.
So, if you would like to add some color to your house exterior, head down to Kumpulan Hardware in Jalan Bukit and ask our friendly staff to recommend you the appropriate color and size for your maximum pleasure!
It happened a lot to me personally, I was in the middle of doing something really important (hammering a nail or fixing something), where the power went off. Those who live in Selangor are really familiar with this phenomenon where the power goes off without prior notice and leave you in an agonizing pain.
Most of us are not prepared for power outage because we always think that this time is the last time, but well, we all know this will happen many many more times and the only remedy to this is to get ready for it!
Some of us may have torch lights or candle, but we all know how inefficient are those illumination devices. Candles, particularly are the most excruciating light source, because not only they don really light up the area, but they also create heat and attract all type of insects and weird being to the light source! in addition, since they are not so bright you'll have to light up more candles which equals to more insects and more heat , lets remember we are in Malaysia and life will not move on without at least a FAN!
Some of us have already adopted new technologies and we use rechargeable torch lights, no doubt they are really good devices specially in time of need (of course not for hammering a nail unless you want to hammer your thumb to the wall as well ) and they light up the area for relatively longer time than candles. The main flaw with these torches are either their battery life is very short or they have design flaws.
As we were thinking how to tackles the power outage issue in our houses we remember we have a light weight and awesome-loaded device here in Kumpulan Hardware which we can introduce to you guys! our RL Emergency lights is not like any other ordinary torch light. Well, the first thing you may notice is, you can charge it, so yeah! its rechargeable (yay for that! ) and the second thing is , there are no light bulb used inside of it and all the light source comes from the 8 LED's located in front of the torch.
Here , is what we think differentiated this product from other similar products and it is another extra layer of LED on the side of the device. What we found awesome about this device is that you can actually set it on the side light source and hang it on the wall. One of the benefits of using LED is , once you fully charge the device , it can run for very long time so you don't have to invest in bulky expensive batteries ( and also battery disposal are extremely harmful for our mother nature).
Imagine you can have a long-life product which could be used in various situation where the possibilities of burning yourself or your house down is near zero ( we do not know if you still can manage to burn your house down in other ways).
So, if you feel like being ahead of others in power outage game, head to Kumpulan Hardware and ask us about the RL Emergency Lamp. We are waiting !
Alright! I guess we will be posting a lot today since I've seen a lot of awesome products in our store which deserve to be mentioned here!
All of us know that we are going through the El Nino and this coupled up with the constant hot weather of Malaysia to create the hottest point in the history of mankind (I'm just exaggerating of course :D). Being hot itself is a huge problem, specially for those people who need to continuously go outside of their "Air-conditioned Green Zone" and get some jobs done. We feel what you feel and we have a global solution for it - no I'm not promoting any product right now- : try to reduce the usage of your vehicle and your carbon foot print and hopefully everything should be fine.
So, this Mr. El Nino doesnt only affect the human brain, I mean it drives us mad sometimes, due to the hot weather, but we are not the only mad ones in this world! well, in most part of Malaysia, mosquitoes also go mad by hot weather and since we are the one to blame, they brutally bite us!
I personally hate mosquito bites because its just simply annoying , who likes mosquito bites anyway ?
Every evening when I reach home, I stock up my mosquito replant spray, put on helmet and turn into a warrior to protect my family, but they usually outnumber us and they often have more deadly weapon in compare to us!
We have come to this realization that mosquito sprays are not as useful as it was before, maybe due to mosquito evolution (or their genius war tactic against us, I honestly dont know!). So few days ago I put our company motto into test to find a solution for my problem. as the motto goes : "All you need" I was looking for "All I need" inside the store when I saw this mosquito repellent device which did not require any liquid or medicine or bullet (or whatever other mosquito repellents require to function). You simply need to plug it into the wall and let the magic happens!
Its a very efficient device which uses very little electricity to function and it is indeed very effective to repel those mosquitoes !
So, up your game in war against the mosquitoes and defeat them once and for all!
VICTORY IS OURS!!
Alright guys! We just spent few days on our screw section. It may sound funny why am I writing about the "screws" in Kumpulan Hardware, but honestly, I think screws are one the most important products we have in our stores. I mean, imagine your life without having screws in your products... everything would be glued to each other or in best case scenario, they would nail it to each other.
I personally dislike products which has been assembled by using glue, it just looks like something to irresponsibly made. Anyway, previously we had a limited stock of size 4,6,8 and 10 screws (self-drilling and self- tapping).
Well, we came to this realization that we did not pay enough attention to these respectful tough beings. So, we decided to re-arrange our whole screw section and re-plan the whole shelf. The end result was kind of beautiful (at least to us :D ) and we feel that we finally achieved "screw perfection"!
Right now, we have wide variety of screws; from size 4 to size 12 we have anything which can fit in your imagination.
Remember, in most of home projects and DIY's you definitely need a screw, and not just any kind of screw! you need the RIGHT size of screw with RIGHT function based on your project. So, head down to Kumpulan Hardware and ask us about our screw collection. We sure will be happy to help you building awesome things!
Ok! since we started to go online, We have decided to announce our promotions online as well ! Here, in Kumpulan Hardware, we have wide variety of products -literally anything you can think of!- and we were thinking, why not we make a promotion for our awesome looking Grade B doors. Its an 8 panel door with no varnish and paint so you have the liberty to customize your door whatever way you wish to! However, we thought a door is totally useless without a lock and handle. So, we have included a very good quality (and of course,good looking) lock-set from Rinocon company.
Here, a sample of Rinocon lock-set if you wish to see how your future lock-set is going to look like:
Looks cool right ? So, we have decided to give this lock away for every Grade B door purchase FOR FREE! no, we are not gone mad, we just value our customer needs and believe in making solutions for them anyhow we can.
So, I guess by now you have been irritated by my long story about this door, well, sorry about that! here is a picture of our grade B door:
So, this is our hero in this promotion, the great grade B door! we have set the price on RM250 per piece with no varnish and paint, the only thing limits you is your creativity!
By the way! we have a very special Mystery Gift with every purchase of our promotioned doors. It will not be revealed until you make it here and ask us to show it to you. So, hurry up ! we have limited stock and we are already selling it fast! make your way to Kumpulan Hardware in Jalan Bukit, Kajang!
See ya!
All exterior paint problems are correctable—find the right solution here. This section lists a variety of common paint problems. To find the exterior paint tips you need to remedy the issue, simply select the problem from the list below.
Alligatoring
Alligatoring is patterned cracking in the surface of the paint film that resembles the regular scales of an alligator. What Causes It? This problem may be caused by applying an extremely hard, rigid coating, like an alkyd enamel, over a more flexible coating, like a latex primer.
Applying the topcoat before the undercoat is dry may also cause alligatoring.
Alternatively, the natural aging of oil-based paints as temperatures fluctuate causes constant expansion and contraction that can result in a loss of paint film elasticity. How to Solve It Completely remove the existing oil paint by scraping and sanding the surface. You can use a heat gun to speed up work on large surfaces, but take care to avoid igniting paint or substrate.
The surface should be primed with a high-quality latex or oil-based primer, then painted with a top-quality exterior latex paint. Note: Images provided by The Rohm & Hass Paint Quality Institute.
Blistering
A blister can form when vapor expands between a coated surface and the film that protects it. What Causes It?Anything from humidity to construction defects to a lack of effective vapor barriers often can lead to moisture condensation on wood siding, which generates pressure on the wood and its coating. As the surface dries, water evaporates, but the paint film does not recover.
Blisters can also form when painting in direct sunlight with solvent-based coatings on a surface that is too warm. When you apply thicker coats, or re-coat before a previous coat has completely dried, the paint surface can dry before the solvent releases from the underlying film. This traps the solvent, which can expand and cause blisters. How to Solve ItTo remove blistered paint, sand and scrape peeling paint to the bare wood. Prime the exposed areas and repaint them. For blisters caused by moisture, minimize any future problems by repairing loose caulking and installing vents or exhaust fans. These will allow moisture to evaporate before it can penetrate wood siding.
For large blistered areas, use a high-pressure washer or a heat gun to speed up the process of removing the paint. Remember that blisters occur only in fresh coats of paint. When they break, they contain no liquid and do not indicate a defect in the wood. They can be removed by scraping and sanding. Note: Images provided by The Rohm & Hass Paint Quality Institute.
Chalking
A fine powder can occur on the surface of the paint film during weathering, which can cause color fading. What Causes It?Although some degree of chalking is a normal, desirable way for a paint film to wear, excessive film erosion can result in heavy chalking.
The use of a lower-quality, highly pigmented paint or an interior paint can cause the paint to erode prematurely and cause chalking. How to Solve ItFirst, remove as much of the chalk residue as possible, using a stiff bristle brush (or wire brush on masonry) and then rinse thoroughly with a garden hose; or use power washing equipment.
Check for any remaining chalk by running a hand over the surface after it dries. If noticeable chalk is still present, apply a quality oil-based or acrylic latex primer (or comparable sealer for masonry).
Repaint with a quality exterior coating. If little or no chalk remains and the old paint is sound, no priming is necessary. Note: Images provided by The Rohm & Hass Paint Quality Institute.
Chalk Run- Down
This problem occurs when the paint film erodes and the resulting residue appears chalky. What Causes It?Chalk run-down occurs when paint erodes excessively onto another area below (a brick foundation, for example), ruining its appearance. The problem has a number of causes.
First, the use of a lower-quality, highly pigmented paint or an interior paint can cause the paint to erode prematurely. Factory-finished metal siding can also erode to cause this problem. How to Solve ItFirst, remove as much of the chalk residue as possible by scrubbing any stained areas with a stiff brush and a detergent solution. Then, rinse the surface thoroughly. In cases of severe staining, an acid wash may be necessary. Either way, if the affected area dries to a different color, consider painting it with a quality latex paint. Eroding aluminum siding should be thoroughly cleaned (power washing recommended) before painting with a quality exterior latex paint. Note: Images provided by The Rohm & Hass Paint Quality Institute.
Cracking or Flaking
Paint can crack and flake, sometimes revealing the substrate. What Causes It?Dry paint can split through at least one coat, which will lead to complete failure of the paint. Early on, the problem appears as hairline cracks. Later, flaking of paint chips occurs.
A variety of causes exist for cracking or flaking of paint. First, if lower-quality paint has been applied to the surface, it will have inadequate adhesion and flexibility. Another cause is that the paint was spread too thin on the surface.
Poor surface preparation, especially when the paint is applied to bare wood without priming, can also cause this problem. Finally, painting under cool or windy conditions can make latex paint dry too fast, causing it to crack. How to Solve ItIf the cracking does not go down to the substrate, you may be able to correct it by removing the loose or flaking paint with a scraper or wire brush, sanding the area to feather the edges, priming any bare spots, and repainting it.
If the cracking goes down to the substrate, remove all of the paint by scraping and sanding or use a heat gun. Then prime and repaint with a quality exterior paint. Note: Images provided by The Rohm & Hass Paint Quality Institute.Dirt Pickup
Dirt, dust particles, or other debris can accumulate on the paint film, which may resemble mildew. What Causes It?Dirt can accumulate on lower-quality paints, especially lower grades of satin or semi-gloss.
Usually, dirt pickup is caused by soil splashing onto siding or results from air pollution, car exhaust, and flying dust collecting on the house body and horizontal trim. How to Solve ItWash off all surface dirt before priming and painting. If unsure whether the problem is dirt or mildew, conduct a simple spot-test (see Mildew). Clean off dirt with a scrub brush and detergent solution, followed by a thorough rinsing with a garden hose. Heavier dirt accumulation may require the use of a power washer.
While dirt pickup can't be eliminated entirely, top-quality exterior latex paints typically offer superior dirt pickup resistance and washability. Also, higher-gloss paints are more resistant to dirt pickup than flat paints, which are more porous and can easily entrap dirt. Note: Images provided by The Rohm & Hass Paint Quality Institute.
Efflorescence or Mottling
Efflorescence or mottling appears as crusty, white salt deposits, leached from mortar or masonry as water passes through. What Causes It?Efflorescence or mottling is caused by failing to adequately to prepare the surface by removing all previous efflorescence or when excess moisture escapes through the exterior masonry walls from the inside. How to Solve itIf excess moisture is the cause, eliminate the source by repairing the roof, cleaning out gutters and downspouts, and sealing any cracks in the masonry with a high-quality, water-based all-acrylic or a siliconized acrylic caulk.
If moist air is originating inside the building, consider installing vents or exhaust fans, especially in kitchen, bathroom, and laundry areas.
Remove the efflorescence and all other loose material with a wire brush, power brush, or power washer; then thoroughly rinse the surface. Apply a quality water-based or solvent-based masonry sealer and allow it to dry completely; then apply a coat of top-quality exterior house paint, masonry paint, or elastomeric wall coating. Note: Images provided by The Rohm & Hass Paint Quality Institute.
Fading or Poor Color Retention
Paint can lighten over time. This occurs on surfaces with sunny southern exposures. What Causes It? Fading or poor color retention can also be a result of chalking of the coating. One cause of fading is the use of an interior grade of paint or lower-quality paint.
This can lead to a rapid degradation (chalking) of the paint film. Some paint colors are particularly vulnerable to UV radiation (most notably, certain bright reds, blues, and yellows).
Fading will also occur when tinting a white paint not intended for tinting, or overtinting a light or medium paint base. How to Solve ItWhen fading or poor color retention is a result of chalking, it is necessary to remove as much of the chalk as possible. When you repaint the surface, be sure to use a quality exterior house paint in colors recommended for exterior use. Note: Images provided by The Rohm & Hass Paint Quality Institute.
Frosting
Frosting appears a white, salt-like substance on the paint surface. Frosting can occur on any paint color, but it is less noticeable on white paint or light tints. What Causes It?On masonry, frosting can be mistaken for efflorescence. Frosting forms mostly in protected areas (such as under eaves and open porch ceilings) that do not receive the cleansing action of rain, dew, and other moisture.
The use of dark-colored paints that have been formulated with calcium carbonate exterior may also cause this. Applying a dark-colored paint over a paint or primer containing calcium carbonate extender can also lead to this problem. How to Solve It Frosting can be a stubborn problem. It often cannot be washed off readily. The condition can also recur as a bleed-through even when a new top coat is applied.
In extreme cases, it can interfere with adhesion. The best remedy is to remove the frosting by wirebrushing masonry or sanding wood surfaces. Then rinse and apply an alkyd-based primer before adding a coat of high quality exterior paint. Note: images provided by The Rohm & Hass Paint Quality Institute.
Lap Marks
Lap Marks are the appearance of a denser color or an increased gloss where wet and dry layers overlap during paint application. What Causes It?Failing to maintain a "wet edge" when applying paint or using low-solid, "economy" paint can both lead to the formation of lap marks. How to Solve It When painting, make sure to maintain a wet edge by applying paint toward the unpainted area and then back into the just-painted surface. This technique (brushing or rolling from "wet to dry" rather than vice versa) will produce a smooth, uniform appearance.
It is also wise to work in manageably sized areas, and to plan for interruptions at a natural break, such as a window, door, or corner.
Using a top-quality acrylic latex paint makes it easier to avoid lapping problems because higher solids (pigments and binder) content makes lapped areas more noticeable.
If the substrate is very porous, you should apply a primer or sealer to prevent paint from drying too quickly and reducing wet-edge time. Alkyd paints generally have superior wet-edge properties. Note: Images provided by The Rohm & Hass Paint Quality Institute.
You don't necessarily have to remove your old wallpaper to paint your walls a different color. Removing wallpaper—especially if it's been on the walls for years—can cause unexpected damage to your walls. But if it's in good condition and has no signs of adhesion failure, there's no reason to invest a lot of time and effort in removing it before painting your walls.
Also, by leaving the wallpaper in place, your walls will stay in their current condition, and you'll be able to start painting without delay. Prep before Painting It's vital to prepare your walls carefully before painting. Follow these simple steps to ensure the best results:
Start by replacing any damaged sections and adding adhesive to loose pieces to minimize the chance the paper will fall.
Add a thin line of clear caulk around the perimeter of the walls, at the joint seam where the paper meets the floor and ceiling. This will help seal the edges and keep the paper from peeling after you've painted.
Cover heavily textured paper with a thin coat of joint compound (spackle). This material will help smooth out the surface so that the texture won't show through the paint.
Gently sand down the seams of the wallpaper so they're not too noticeable.
Apply a coat of oil-based primer to the entire surface of the walls before painting. This helps seal the adhesive within the paper and away from the moisture in the paint.
The wallpaper is now ready for painting. Because the moisture in latex paint can sometimes loosen wallpaper glue, causing bubbles or peeling, you should use oil-based paint.
Finally, it's time to enjoy your freshly painted room.
This home improvement project will use Venetian plaster. Make sure to mix the contents well for a consistent look and smooth application.
Learn how to give your stuff new life with a few good strokes. Note: Many manufacturers make specialty paints for specific applications; ask your paint dealer.
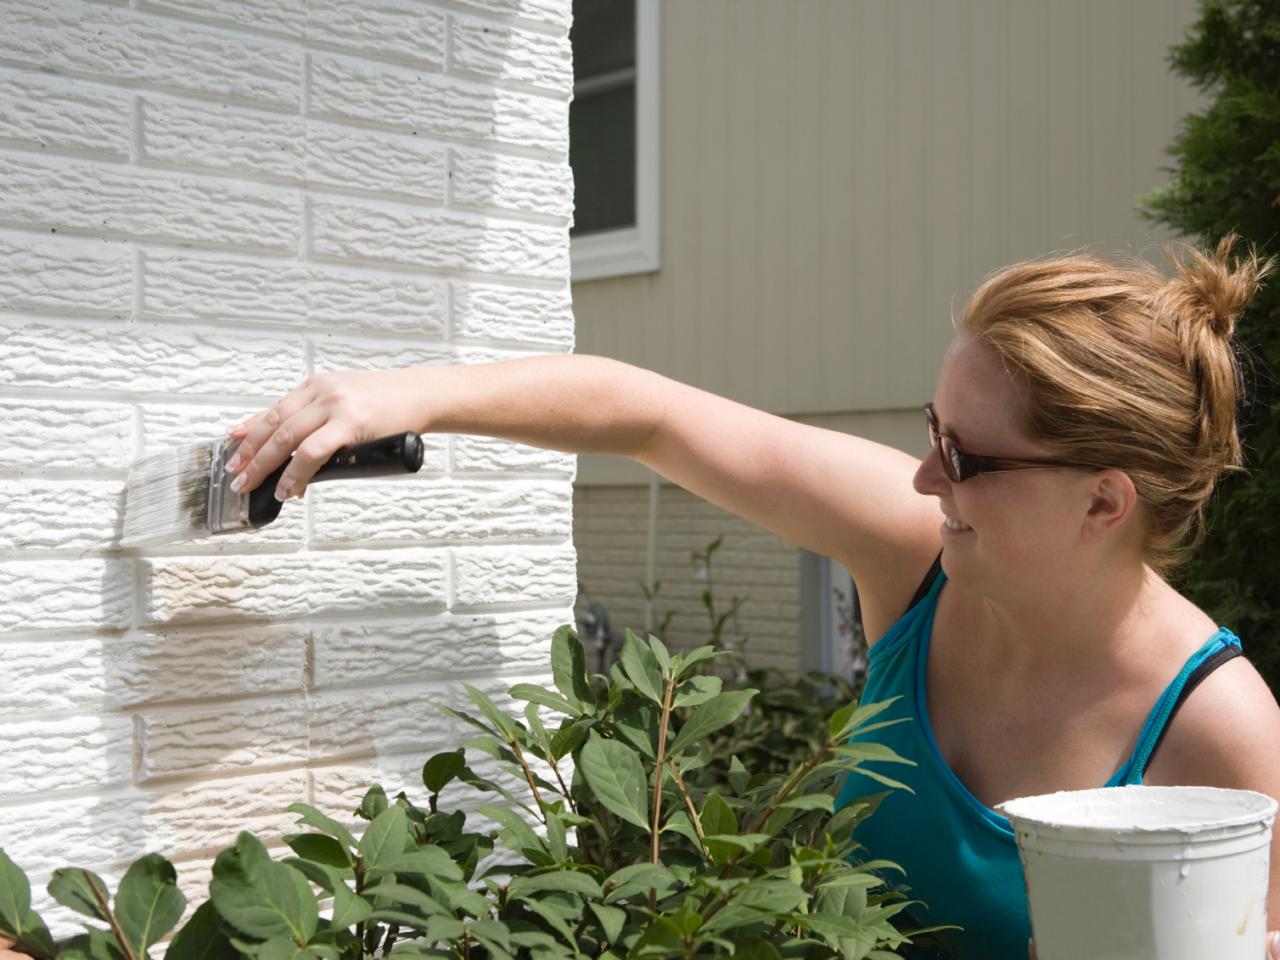
Brick
Set-up and Prep: Clean brick with a wire brush to remove dirt and grime; be careful not to dig out any mortar. Scrub the masonry with soapy water and rinse thoroughly. Let dry for 48 hours.
Painting: Use a first coat of quality latex primer. When the primer is dry, apply top-quality latex paint that's formulated for use on masonry. Use a long-nap roller to cover most of the surface, and a brush to get into grout lines and crevices. Watch for drips – there's a lot of texture to a brick surface, so keep an eye out for runs. A second coat is recommended.
Heads-up: Don't use a pressure-washer to clean your brick; the risk of gouging out mortar is too great. Note that painting brick is a one-way decision — it's almost impossible to remove paint from brick surfaces.
Preparing And Painting Exterior Brick
Brick siding is painted bright white on the exterior of a home.
Ceramic Tile and Porcelain
Set up and Prep: Sand with 150-grit sandpaper to improve adhesion. Clean the tile surfaces with TSP or other non-residue cleaner.
Painting: Use a top-quality acrylic primer. Finish with semi-gloss acrylic interior paint. If you want, paint the grout a contrasting color — but you'll need patience and a steady hand.
Heads up: For best adhesion, allow the paint to cure for 10 days to two weeks before using the surfaces. Don't paint tile floors; there's just too much traffic and abrasion.
Concrete Slabs
Set up and Prep: Wash the slab with TSP or other non-residue cleaner. Remove any old, flaking paint. Treat oily spots with a degreaser. Let everything dry for 48 hours. Etch the surface of the concrete with a mild (10 percent) solution of muriatic acid (make sure you have plenty of ventilation).
Painting: Use a primer and paint specifically formulated for concrete floors. Apply the paint according to the manufacturer's instructions.
Heads up: Make sure your concrete isn't wicking moisture up from underneath. Tape a 2x2-foot piece of plastic to the floor (tape all edges) and wait a couple of days. Check underneath the plastic to make sure no moisture has formed on the underside of the plastic. If it has, your slab isn't a good candidate for paint.
Concrete Block
Set up and Prep: Remove any loose particles and mortar, using a wire brush. Remove efflorescence with a bleach solution made from 1 cup bleach in 1 gallon of water. Clean the entire surface with TSP or other non-residue cleaner. Let everything dry 48 hours before painting.
Painting: Prepare raw block with a masonry sealer. Let dry thoroughly, then apply a high-quality acrylic latex primer. Finish with acrylic latex paint.
Heads up: For new concrete and block installations: Wait 90 days before applying paint.
Concrete Blocks Ready For Painting
These concrete breeze blocks are ready for painting prep.
Photo by: Ken Welsh
Ken Welsh
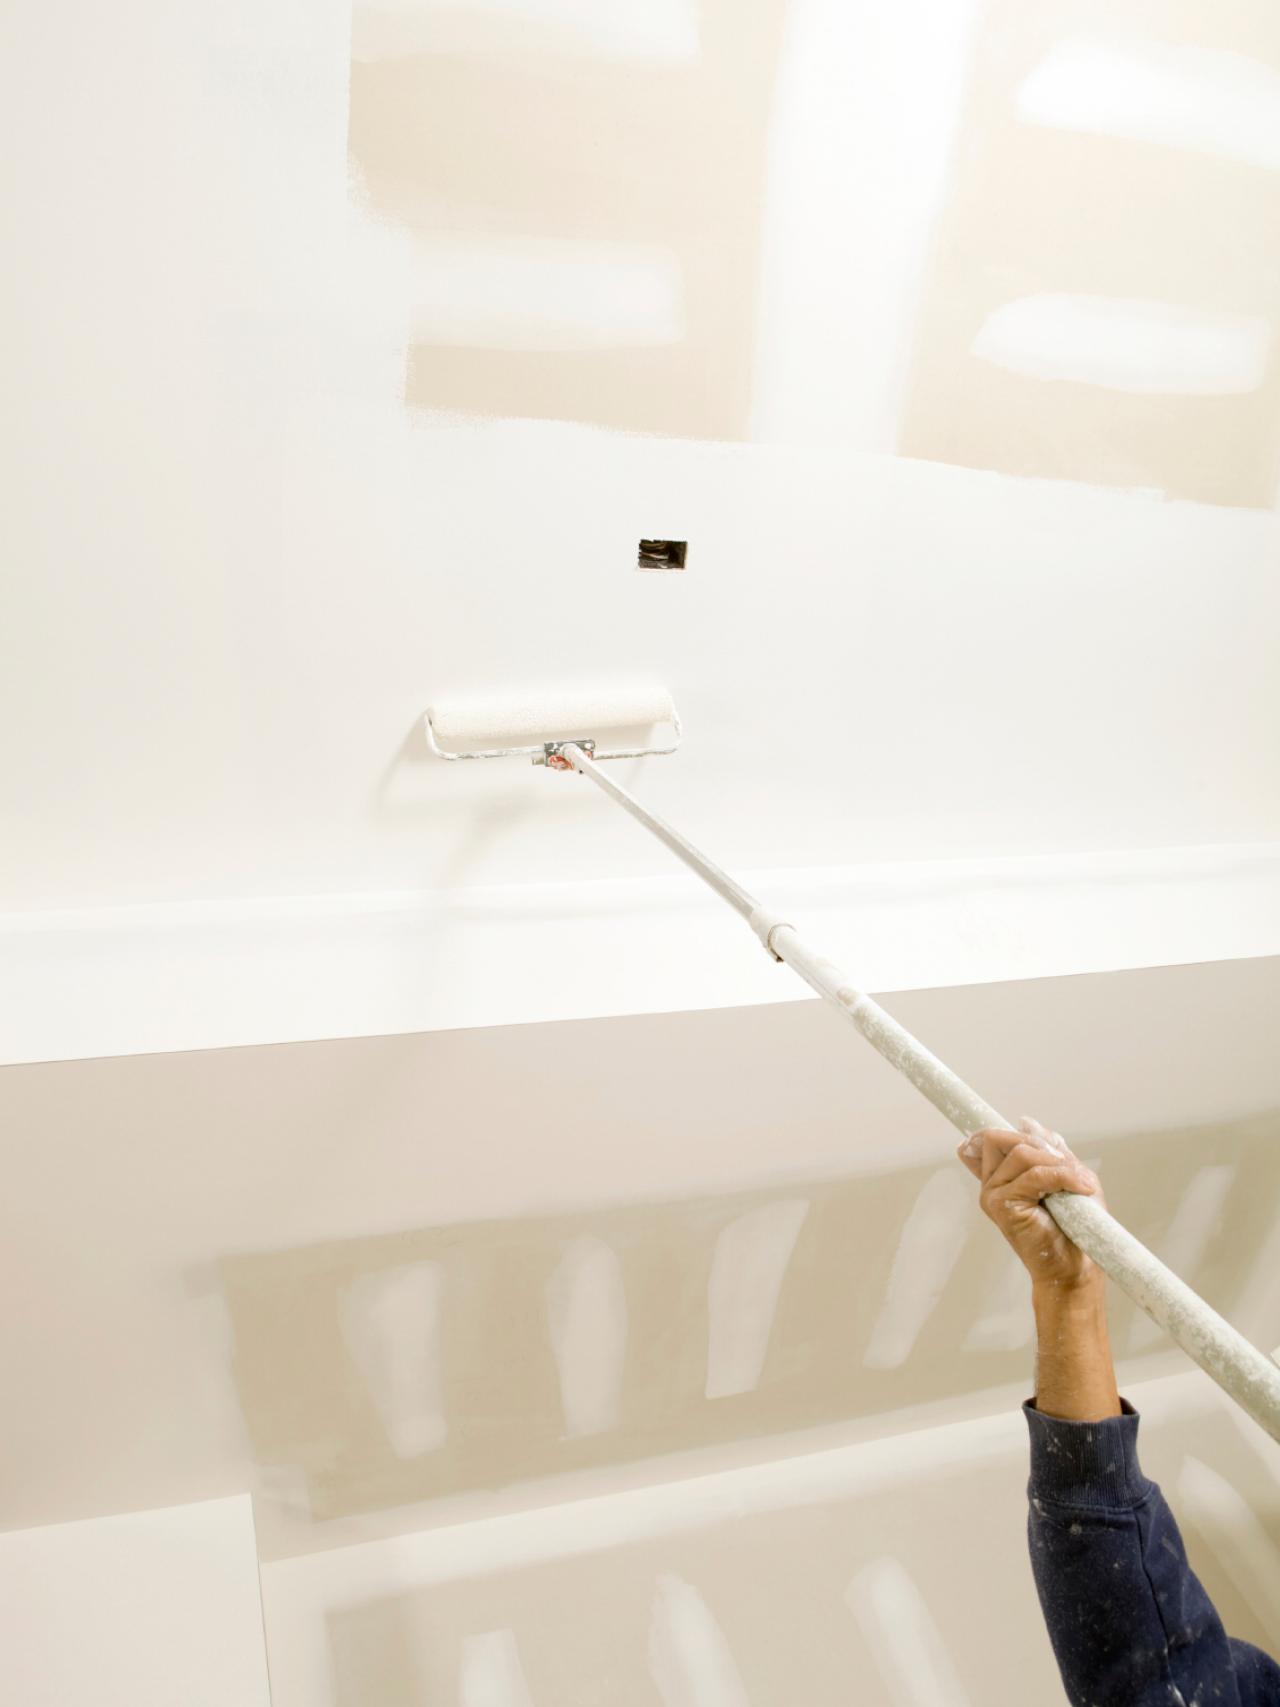
Drywall
Set up and Prep: Make sure the drywall is free of dust (there's usually a lot of it from sanding). Wipe the surfaces lightly with a damp rag. For painted drywall, repair any cracks and holes with spackling compound.
Painting: Use a top-quality acrylic latex primer. For previously painted drywall, use a stain-blocking primer to cover any marks or blotches. Finish with a good-quality acrylic latex paint.
Heads up: The higher the paint sheen, the easier it is to wash and clean the surface. Semi-gloss is good for kids' rooms and kitchens.
Painting Drywall With Roller And Extension Pole
Drywall is painted white with a roller and extension pole.
Fabric
Set up and Prep: Wash fabrics without detergent and let dry. If possible, stretch out the fabric and lay it flat.
Painting: Use a water-based paint specifically formulated for use with fabrics. Check your local crafts store.
Heads up: You may have to fix the paint by putting the material in a dryer. Read the paint manufacturer's instructions carefully.
White Fabric Ready For Painting
It might seem like a stretch, but fabric can be painted if it's cleaned and prepared correctly.
Photo by: supergabur
supergabur
Fiber-Cement Siding
Set up and Prep: Don't pre-sand fiber-cement; the dust may cause respiratory ailments.
Painting: Use a primer specifically formulated for cement and masonry products. Apply top-quality exterior paint according to the manufacturer's instructions.Heads up: Don't apply oil-based paint directly to fiber-cement without priming — you may void the manufacturer's warranty.
Fiberglass Exterior Doors
Set up and Prep: Set the door flat on a pair of saw horses. Remove all hardware. Lightly sand with 320-grit sandpaper. Remove the dust using a rag dampened with acetone. Allow to dry thoroughly.
Painting: Prime with an acrylic latex primer. When dry, apply two coats of top-quality, exterior-grade latex paint, using a brush. Sand lightly between coats.Heads up: Don't use regular household cleaners to prep your door — they may leave a residue.
Fiberglass Tubs and Showers
Set up and Prep: Sudden blasts of hot water are hard on painted fiberglass baths and showers, and various DIY methods for refinishing have mixed results. The most effective way we've found calls for finishing with automotive paint. The paint should be applied with a high-volume, low-pressure paint (HVLP) sprayer.
Sand the surfaces lightly with 220-grit sandpaper. Wash the surfaces thoroughly with TSP or non-residue cleaner, and rinse with water. When dry, wipe all surfaces with lacquer thinner. Make sure you have plenty of ventilation.
Painting: Apply an auto primer. When dry, lightly sand with 320-grit sandpaper, and wipe away the dust with damp rags. Apply a polyurethane-based automotive paint, using an HVLP.
Set up and Prep: Clean the surface with a glass cleaner.
Painting: Glass painting is a popular hobby or craft project. Check your local hobby store for paints formulated to use with glass. Some may require an undercoating or special surface application.
Heads up: Lighter colors are better for light transmission.
Laminate Countertops and Cabinet Faces
Set up and Prep: Rough up the surfaces with 150-grit sandpaper. Remove all dust and wash with TSP or other non-residue cleaner.
Painting: Use a primer specifically formulated for non-porous surfaces. Finish with at least two coats of acrylic latex enamel, using a short-nap roller.
Heads up: Painting laminate countertops isn't a permanent solution; consider it a stopgap until you can replace the countertops.
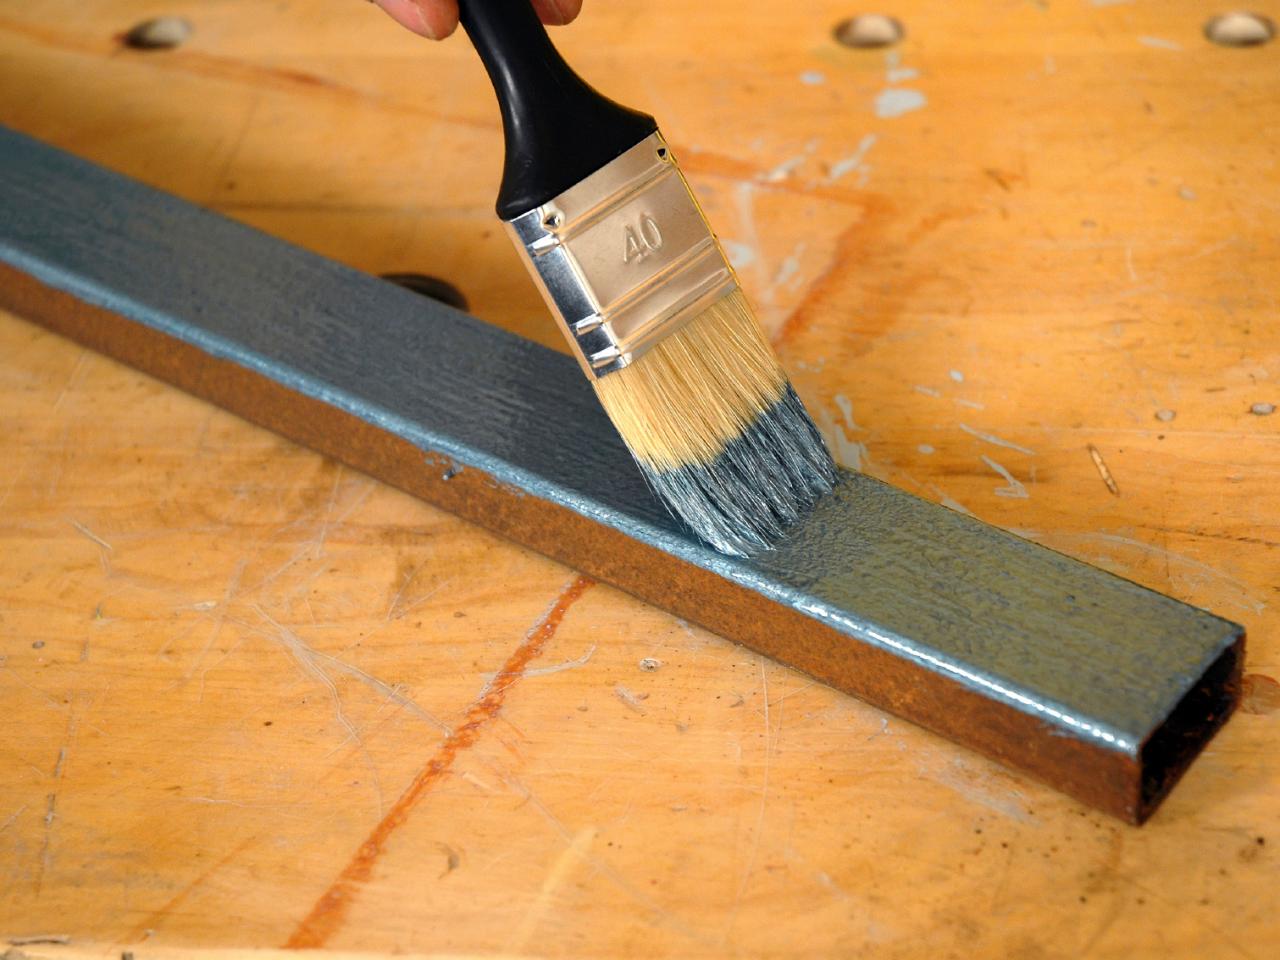
Metal
Set up and Prep: Remove any rust and flaking with a wire brush. Sand with 220-grit sandpaper. Rinse with plain water, let dry.
Painting: Use an exterior-grade primer and paint that are formulated for metal.
Heads up: The method is the same for steel, aluminum and iron.
Preparing And Painting Metal
Metal can be prepared with wire brushing and sanding and then painted with exterior primer.
Plastic
Set up and Prep: Sand lightly with 320-grit sandpaper. Wash with TSP or other non-residue cleaner, and rinse thoroughly.
Painting: Use a spray paint formulated for plastic. Alternative: Use exterior-grade acrylic enamel.
Heads up: After prep, don't touch the plastic with your bare hands — you'll leave oil residue that keeps the paint from sticking.
Vinyl Flooring
Painting: Sorry, not a good candidate. The surface offers poor adhesion, and flexing from foot traffic and day-to-day abrasion soon wears away paint.
Vinyl Shutters
Set up and Prep: New shutters should be wiped with mineral spirits to remove any factory-applied mold-release agents, then washed with a mild detergent. If your shutters have been outside for more than two years, you can skip the mineral spirits wipe.
Painting: Prime the shutters, using a primer specifically made for plastic and vinyl. Finish with a top-quality latex paint.
Heads up: Vinyl products are tricky to paint. Once painted, you'll want to keep your shutters undisturbed for five days in a protected location — a garage is great — to let the paint cure thoroughly. Avoid dark paint colors that absorb heat and make the vinyl expand and warp.
Vinyl Siding
Painting: The debate rages here, but the best advice is: Don't do it. A big surface area and a tricky material add up to lots of opportunities for paint failure. A lot of work for a result that could deteriorate in a year or two.
Wicker
Set up and Prep: With all its cracks and crevices, the important prep for wicker furniture is to make sure it's clean. On a warm day, give the wicker piece a hard spritz with a garden hose and wipe it dry immediately. If previously painted, sand lightly to remove any gloss.
Painting: Prime with a top quality primer. Paint with exterior-grade acrylic latex paint; a brush helps get into the crevices.
Heads up: Make any repairs prior to painting.
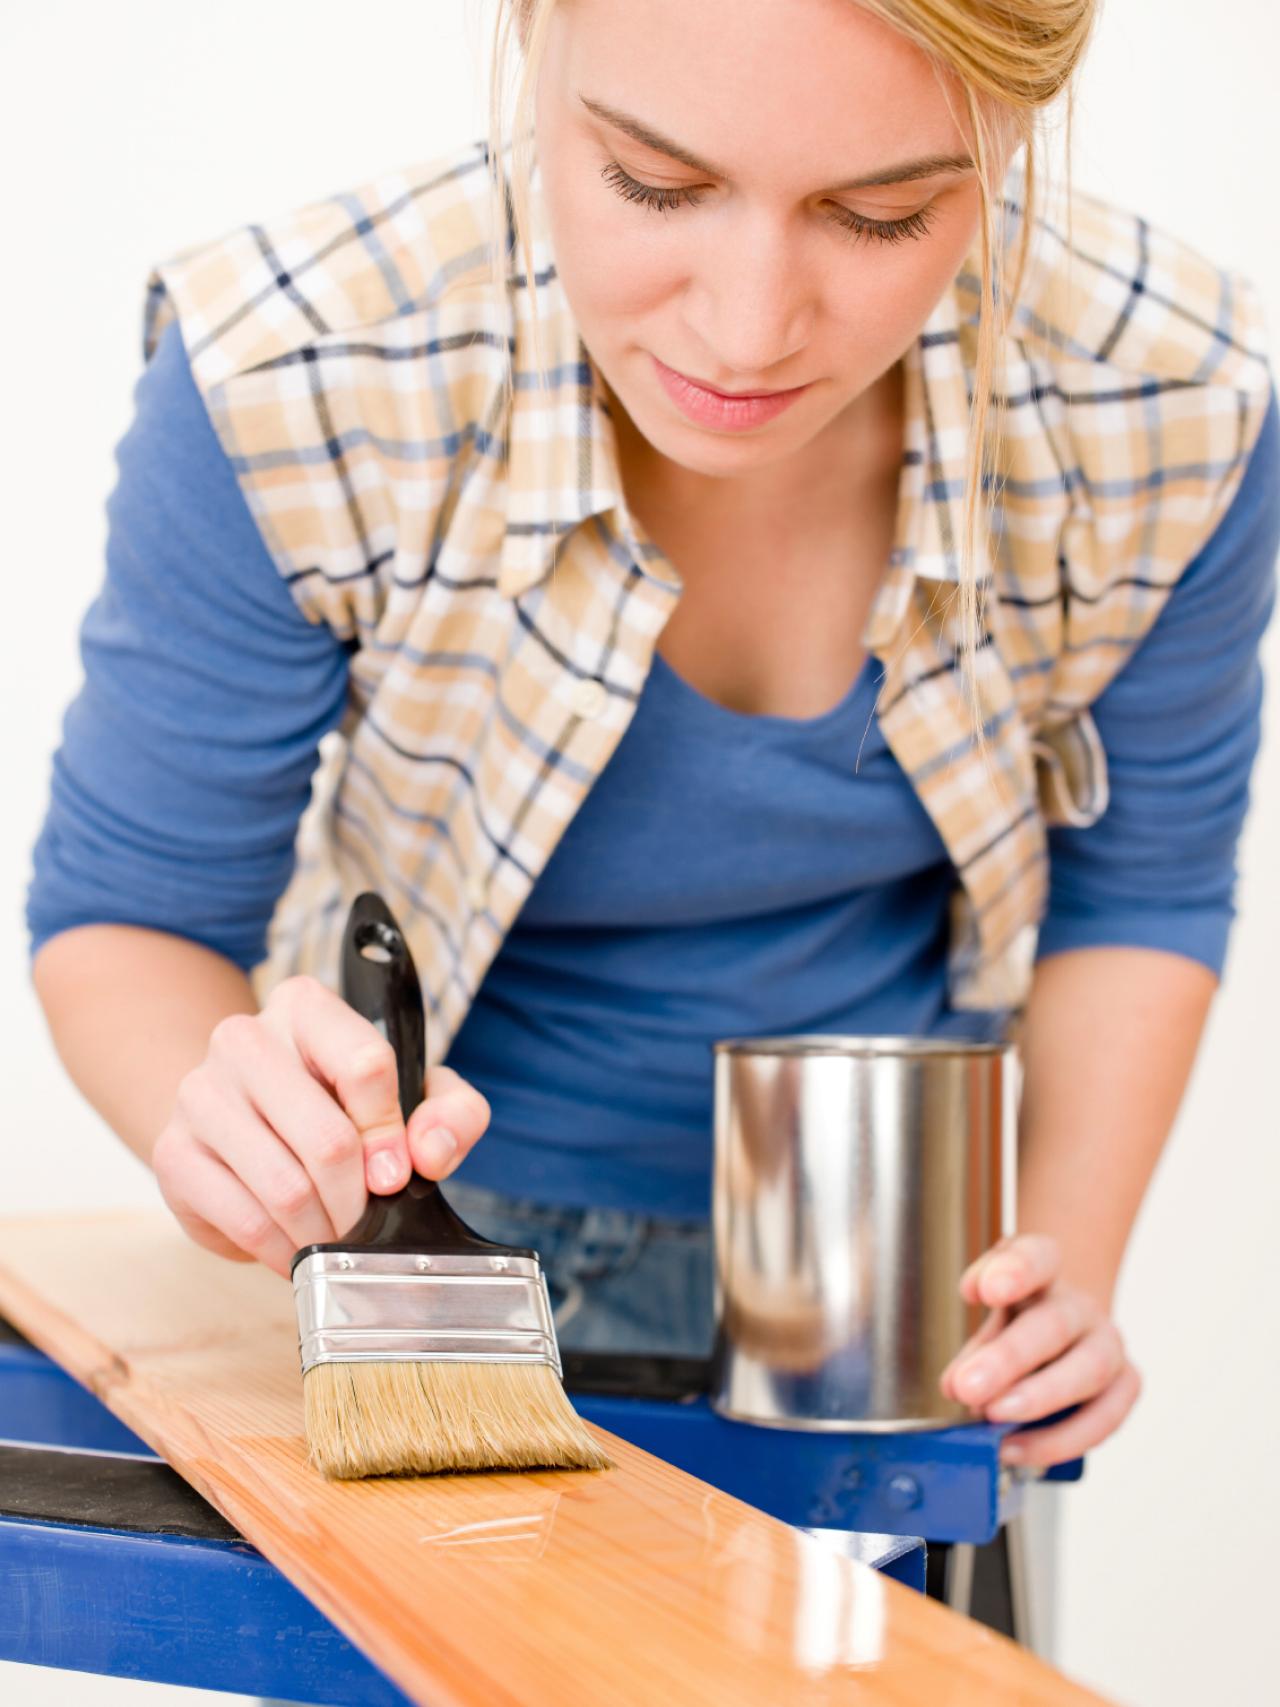
Wood (Bare)
Set up and Prep: Sand with progressively fine sandpaper until the surface is smooth. Remove dust with a tack rag.
Painting: Coat entire surface with a stain-blocking primer. Finish with high-quality latex or oil-based paint. Sand between coats with 320-grit sandpaper.
Heads up: After priming, check to make sure any knots aren't showing through. If they are, spot prime.
Painting Prep For Bare Wood
Painting prep for bare wood involves sanding and priming.
Photo by: J.M. Guyon - Copyright 2010
J.M. Guyon - Copyright 2010
Wood and Paneling (Painted or Sealed)
Set up and Prep: Clean surfaces with TSP or other non-residue cleaner. Roughen the surfaces with 150-grit sandpaper; clean off the dust with a damp rag.
Painting: Coat surfaces with stain-blocking primer. Finish with topcoats of latex paint.


